How to Create Jigsaws in PowerPoint
01 Mar 2014PowerPoint is a term used to strike fear into the hearts of office workers the world over, but much like a firearm it is more about whose hands it is in that makes the difference. I may not be a PowerPoint guru, but on many occasions over the years I’ve found myself needing to wrestle with its functions and features to produce the effect I (or more frequently someone else) want(s). One effect that keeps cropping up is that of a jigsaw. The analogy of the complete picture and how pieces fit together (or are missing) lends itself well to many aspects of business and life in general. Since it has been such a popular request I thought I’d share some techniques and some templates that I use to produce jigsaws in PowerPoint.
The techniques I use probably aren’t going to give you “amazing results”. You are unlikely to be able to print a quality jigsaw puzzle using these methods. However for getting the point across on a handful of slides … I’ve found that the result is certainly good enough. With that in mind let’s look at creating our first piece of the puzzle - literally the first piece of the puzzle.
Creating a Jigsaw Piece
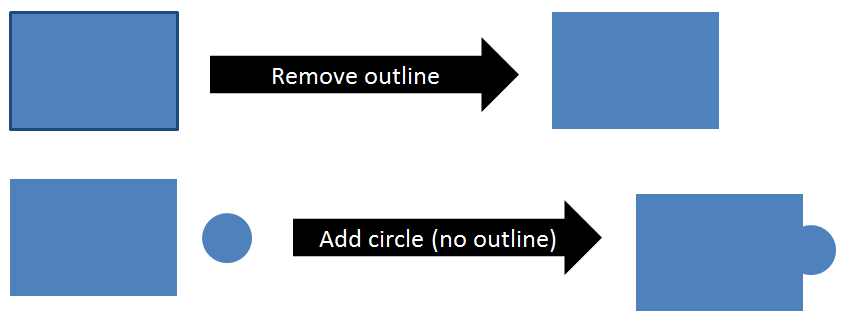
As any seasoned veteran of jigsaw construction knows, the best place to start is with a corner. We’ll be taking a simple view of pieces to start and so we’ll begin with adding a rectangle to a PowerPoint slide. This can be created by selecting the Insert tab on the PowerPoint ribbon (I’m using PowerPoint 2010 here, but this is possible in many other versions too) and selecting Rectangle from the Shapes drop down menu. By default the rectangle will have one colour for the outline and one colour for the fill. We want to remove the outline to just leave the fill. To do this, with the rectangle selected, select the Format tab on the ribbon and select no outline from the Shape Outline menu.
Next create a small circle and repeat the process to remove the outline of the circle. Now overlap the circle onto the rectangle to produce a very basic jigsaw piece.
Creating a Simple Jigsaw
Now let’s use this piece as the building block for creating a simple 2x2 jigsaw. Create three more simple jigsaw pieces (make them different colours) each time moving the circle to another side.
To make it easier to move the jigsaw pieces around we’ll link the pair of the (same coloured) circle and rectangle to. In turn, select both items in each pair and press CTRL+G to group them into one object. Do not do this for the first piece.
It’s fairly obvious that at the moment we have four jigsaw pieces that don’t fit together. We may have the joints, but there are no gaps in any shape to plug them into. The reality is that for our first jigsaw we don’t need there to be. Simply imagine laying the pieces on top of one another - we can make it look like they fit.
If we move the second, third and fourth pieces together we get something like this…

So it’s like the pieces are layered on top of one another in the wrong order. If we select a jigsaw piece at a time in reverse order (4th, 3rd, 2nd), right click on it to bring up the context menu and then select Bring to Front, we can start to see the jigsaw forming.

However we can only ever have a shape on one level. If we were trying to do this with paper, to introduce the first piece we would need to have it interleaved so it is on the bottom as well as on the top. But if you recall our first jigsaw piece we actually chose not to group the rectangle and circle together. So we can move the first rectangle into place (and opt to Send to Back if necessary from the right click context menu) as the back most piece. Next select the first circle and bring it to the front (from the context menu), then move it into place.

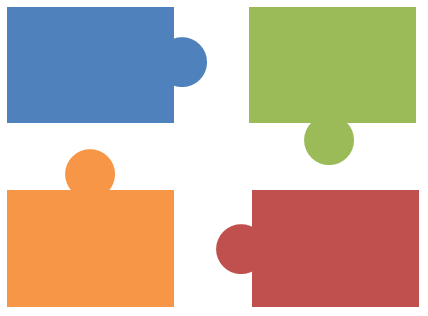
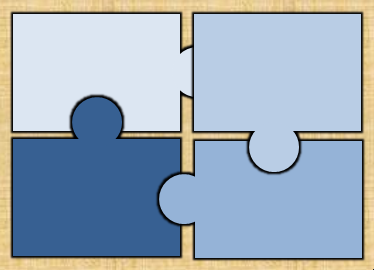
The final result should look something like this.

So that’s your first simple jigsaw done. The same principle can be applied to jigsaws containing more pieces in the same way.
Creating a Jigsaw With a Missing Piece
What if you want your jigsaw to have a missing piece? Well let’s take another look at our jigsaw. We did have a point at which our pieces were all there but the first piece was not in place. It looked like this.
The jigsaw effect is lost because we don’t have any notches cut out of our pieces. I’m guessing many of you will have figured out that we can just lay some circles the same colour as the background onto a couple of the pieces.

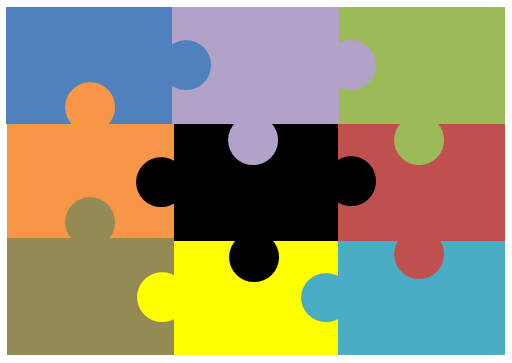
Which is great until your jigsaw is on a slide with a background that isn’t a single colour. The quick and dirty solution to this might be to change the background of this particular slide or to place the jigsaw on top of a box of a solid colour. But there’s actually another way. Let’s assume we’ve got to the point where we’ve added some circles to the jigsaw, but now it has a more complex background.
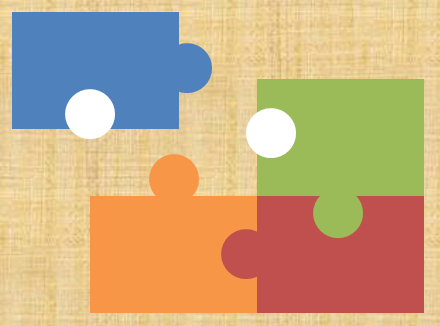
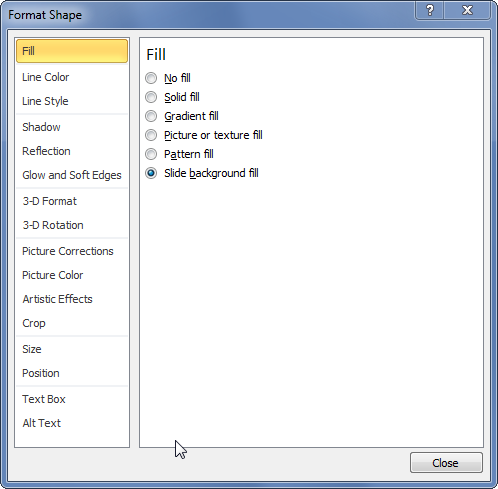
By bringing up the right click context menu on each of the white circles and selecting Format Shape this displays a dialog box which allows us to change the Fill to Slide Background Fill.
Doing this allows the background to show through and our jigsaw is back to looking right. You could even rotate and move the parts to add an extra bit of creative flair.

Creating a Jigsaw With Complex Backgrounds for Pieces
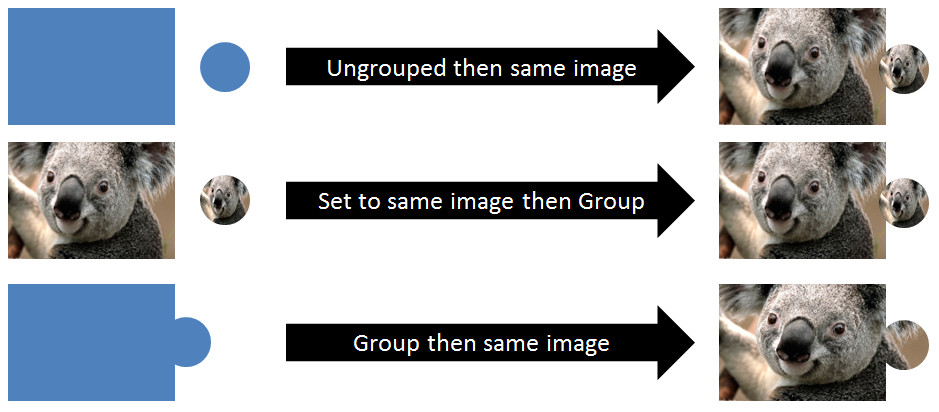
So far, so good. We can now cope with pieces being out of place and we can allow background images to come through when the pieces aren’t all in place. But what happens if our pieces have patterns or images too? Well when the rectangle and circular joint are grouped together and you then set the fill as an image, it fills both in a seamless way. If you set them whilst ungrouped (or don’t bother grouping) you’ll have two images instead of one.
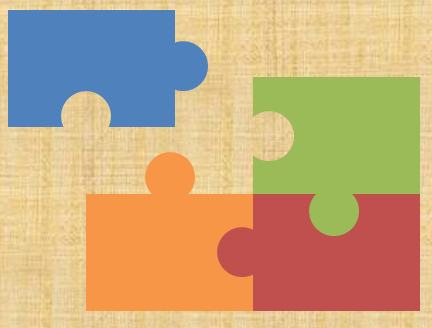
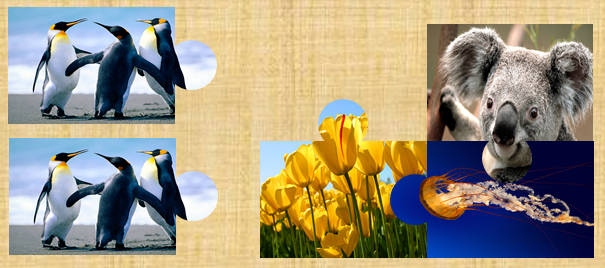
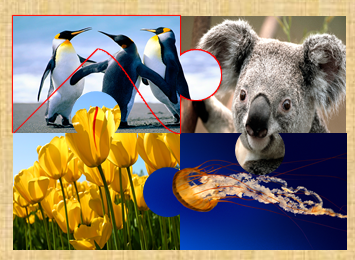
So on that basis and with the information in the previous sections you should be able to produce a jigsaw like this without too much trouble.
However what happens when we want to put the last piece back in? We can’t just overlay a circle with the image in like we did for the background colour. As we saw above, unless the image is made for the grouped rectangle and circle it won’t be a single image for the combined shape.
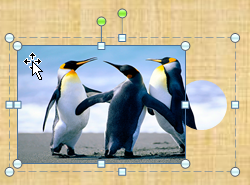
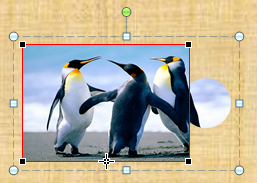
So to get this to work we first want to have our final piece as a single grouped shape and for it to be duplicated.
Then move one of the pieces into place in the jigsaw and send it to the back.

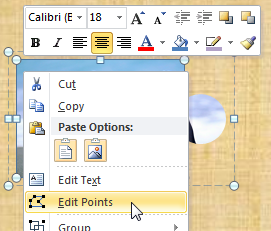
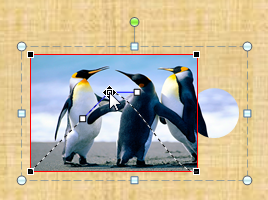
On the unplaced piece, click it once to select the jigsaw piece and click in the rectangle to select that particular part. Open the right click context menu and select Edit Points.
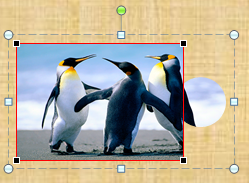
A red box will now surround the rectangle. Move the mouse pointer to the middle of the bottom line until it changes to a kind of cross hair. Click and drag the centre point up to create a roughly triangular void.
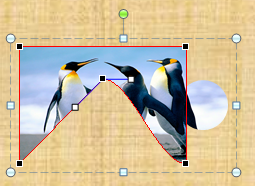
Now click outside of the shape. Bring this jigsaw piece to the front and lay it over it’s twin piece.
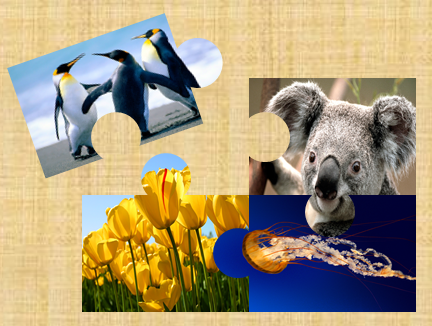
The result is a jigsaw of differing images.

Creating a Jigsaw With a Single Complex Background
Finally that brings me to a jigsaw with a single background image. So far we’ve looked at pieces where the edges are distinct either by colour or by differing images. But when you have just one image then you need to highlight the edges. I tried experimenting with all sorts of outline orders, groupings and fill options, but nothing seemed to give me quite what I wanted as I always seemed to get edges that overlapped in the wrong place. So rather than a solid edge I hit upon the idea of using something outside of the shape.
So let’s start with our four basic jigsaw pieces. The top left piece is laid first and the following three pieces in a clock-wise order.

Then rather than using shape outline, we set each of the four pieces to have a glow. For each piece, right click on it and select Format Shape from the context menu. Next select Glow and Soft Edges. Here I set the options to be black in colour, with a size of 4 pt and a transparency of 0%. You should adjust these to something that works for your particular need. The result is something like this.
Now we need to produce some additional pieces. I started by duplicating the top left piece twice.
With the first duplicate I selected the inner rectangle by clicking on it twice and then dragged the edge handle to resize just the rectangle. i.e. the circle remains the same size. Try and make the rectangle quite narrow. It won’t matter too much if the circle ends up poking out on the other side, narrowness is more important.
With the second duplicate I selected the inner circle by clicking on it twice and then deleted it to just leave the rectangle. I then resized the rectangle to be quite narrow. It simply needs to be fractionally wider than the width of the glow on the edges of the jigsaw pieces. Finally I opened the glow settings for the rectangle to remove the glow. There are other ways to do this, but the result is a rectangle with no edge that is exactly the same height as the jigsaw piece, wider than the glow edge width on the jigsaw pieces and narrow enough to fit onto the jigsaw in a way that’s best just to simply illustrate (below).
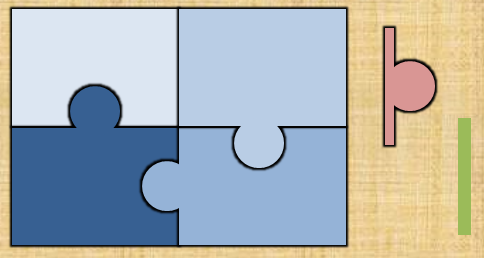
I’ve changed the colours here for clarity, but otherwise you should get a couple of shapes like this along with your jigsaw pieces.
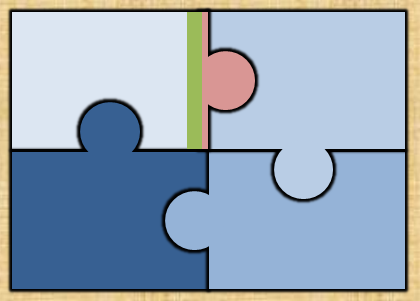
Next we need to move the additional pieces on top of the other jigsaw pieces. Note that the rectangle with no border is placed over the left border of the other new piece. From there select the jigsaw pieces and overlaid additional pieces and group them together.
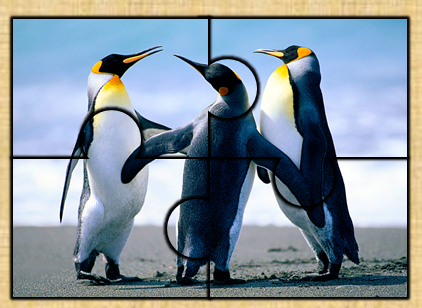
From there we can simply select our image to fill the grouped shape with and hey presto we have our result.
You may notice some aberration around the edge on the top left piece as there is in effect a double glow effect for the overlap between the overlay piece with the glow on the top left jigsaw piece. By keeping the rectangle on that piece quite narrow we can reduce the effect and I think that you would have to be looking pretty closely at a presentation to spot it and even then I wouldn’t expect it to detract from the message.
So there you have it. A whole range of tips and tricks for creating jigsaw effects in PowerPoint. To help you on your way I’ve also created a slide deck with some of the examplesin. I’d recommend using it in conjunction with this post to create your own PowerPoint jigsaws.
If you have any other ways to do this, any improvements to these techniques or if you just want to say thank you, please leave a comment below and of course fell free to share this post with others.