Workflow: How to Share a Workflow
24 Jun 2017Workflow is a fantastic automation app for iOS that allows you to build sequences of actions to achieve some sort of repeatable ‘workflow’. This has benefits in saving you time, providing consistency and in some cases simply providing you with a way to actually do something that you otherwise wouldn’t be able to with the tools at your disposal. Whilst there is a synchronisation service available to keep workflows aligned across your iOS devices and there is a gallery of workflows available through the app it can be useful to share workflows directly with others. In this post, I’m going to quickly cover the primary options you have.
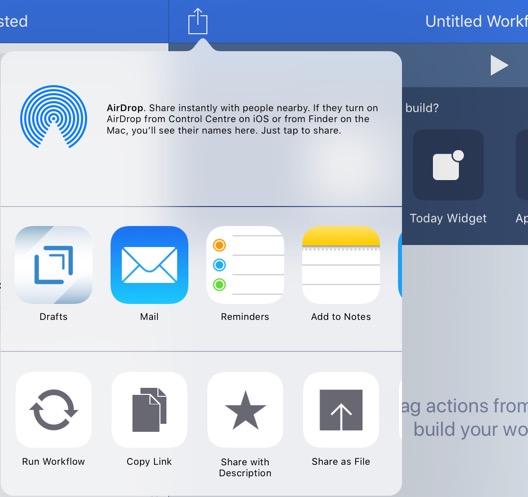
The export options available for the workflow app are available via the share sheet; just like any other sharing activity on iOS. The three options are.
- Copy Link
- Share with Description
- Share as File
1. Copy Link
Copy link is the probably the simplest share option and is the one I use most frequently. It provides a URL to a web page from which you can preview and download a workflow.
The link below provides an example workflow whereby you can view such a web page.
The download link on that page contains a URI that incorporates a direct link to the file that defines the workflow.
If you are familiar with URL encoding you Workflow’s URL scheme, you may spot that the URL parameter being passed to workflow for import is actually https://workflow.is/workflows/20ff33b38a12498e9c95d04b160a848a.wflow, which is the same as the page URL except with ‘.wflow’ appended to the end. That makes it easy for you to provide a link to the file or the workflow import by amending the content of the originally copied link.
2. Share with description
The second option is to share a link to a similar page. This time however you get an additional pop-up that allows you to specify a description that gets displayed on the workflow preview and download web page.
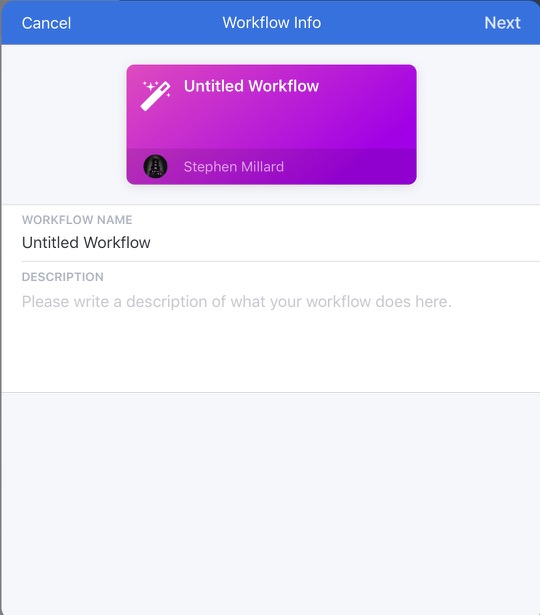
If you need to provide some additional information about the workflow this is a good place to put it … though I’d also personally recommend saving it in a comment in the workflow as people don’t always have a link handy back to the original workflow source; but they do always have the workflow.
The link below provides an example workflow whereby you can view a preview web page with a populated description.
Note that the workflow is identical, but the URLs are slightly different. This is simply because every time you share the workflow it will create a new instance.
3. Share as file
Finally selecting the Share as File share option will create the workflow file and will then immediately pop-up the share sheet once again so that you can decide where you want to save/copy the file to.
Using this method you can do things like add the file to an e-mail or save it to cloud storage.
The file generated is a ‘.wflow’ file just like we saw in the direct download URL above. All of the share options are creating this file. The previous two simply automatically upload it to a cloud server and generate a preview web page for it, whereas this method keeps the file locally.
Wrap up
There you have it. Three inbuilt ways to share workflows from Workflow. You can use these methods to take backups, share workflows with the public or even pass them on to the Workflow team should you find a suspected bug or issue.