The Basics of Templater for Obisidian
24 Jul 2021Contents
- Obsidian Templates
- Installing Templater
- Configuring Templater
- Example Templates
- Inserting a Template
- Conclusion
The personal knowledge management application Obsidian has a built in templating system that allows you to insert boiler plate text into an Obsidian note. While it is entirely functional, the Obsidian community is full of talented developers, and through its plugin architecture, a templating plugin surfaced that provided considerably more functionality than the core plugin. I recently posted about one of the more advanced uses for this plugin, and was contacted by one of my readers to note that I had not actually explained how to use templating. In this post, I’m going to attempt to address that omission.
Obsidian Templates
In Obsidian, “templates” is the term used to refer to a set of Markdown files that can be quickly inserted as into another file within Obsidian. This insertion copies the text into the new file.
This functionality is available via the core Obsidian plugin “Templates”. The plugin can be enabled in an Obsidian vault by navigating to Settings > Core Plugins and enabling the “Templates” plugin.
You can then set-up and access templates as per the instructions in Obsidian’s help.
At the time of writing, Obsidian supports a small set of dynamic tokens or placeholders too. You can use a special code to insert the title of the file (the base file name), or elements of the current date/time.
All in all, quite useful. But the Templater plugin takes this much further with many more tokens you can use, dynamic population of placeholders so that it is regenerated each time you view the page, and even the option to program templates for practically limitless flexibility.
Installing Templater
As a popular community plugin, Templater is relatively easy to install.
- Open the settings for your Obsidian vault.
- Navigate to “Community Plugins”.
- If Safe Mode is disabled, enable it.
- On the same page, select the Browse button for “Community Plugins”.
- Search for “Templater” by SilentVoid.
- Select Install.
- Close the plugin search/install window to return to the “Community Plugins page”.
- The Templater plugin should now be listed; enable the toggle to its right to complete the installation and enable the plugin.
Do also make sure that you do not have the Templates plugin enabled. This is a core plugin and can be found under the “Core Plugins” section of the settings, just above the “Community Plugins” section.
Configuring Templater
The first thing to do is to create a folder in your vault in which to place your template files. In each vault, I create a folder called “Templates” in the root of the vault.
I have quite a few templates, and to help me manage them I also use sub-folders within this folder (and some naming conventions). But effectively, everything under the specified folder will be available to Templater once Templater has been configured.
In Settings, you should now see a new item in the navigation list - Templater. Select this and you will be presented with the configuration options. The most important option to set is the “Template Folder Location”. I set this to Templates.
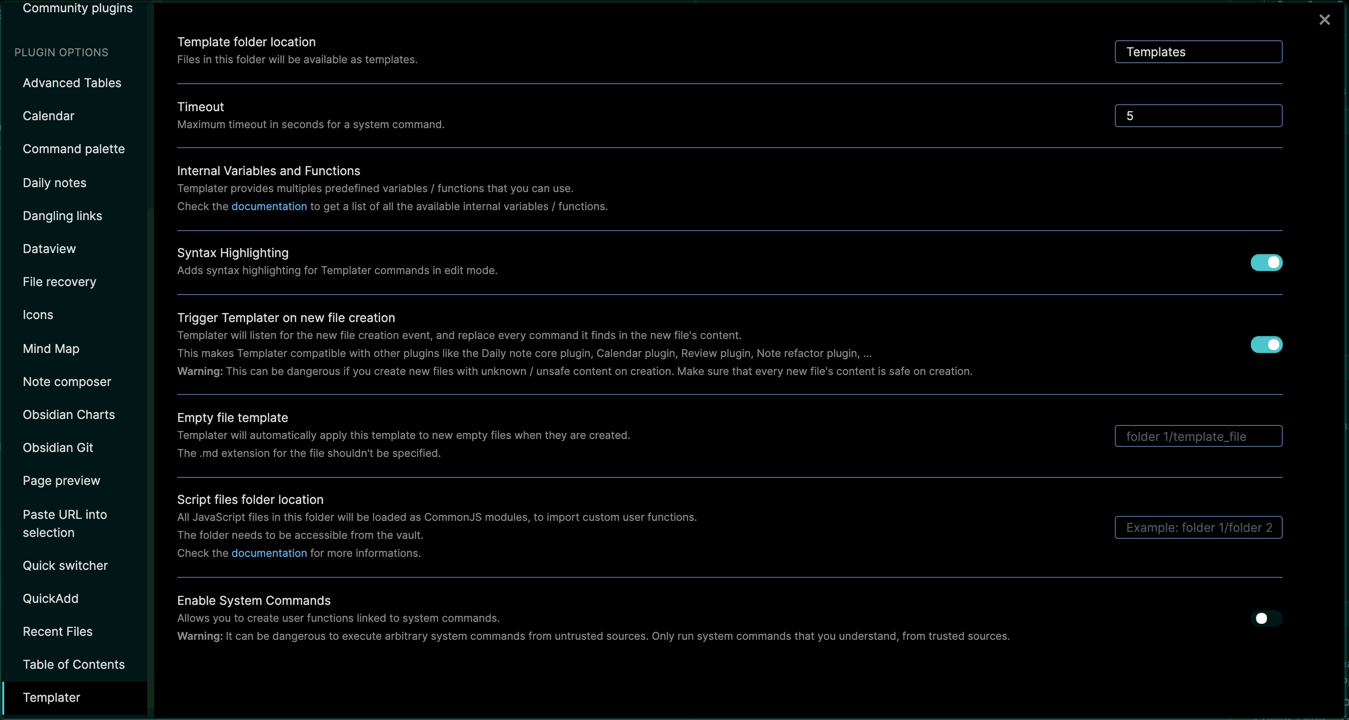
The other settings here I generally leave as above until such time as I may need to modify them. Working cross-platform, I usually keep clear of the system commands as they vary across systems, and are not available on all systems.
Example Templates
You can create templates just like any other note in Obsidian, except that as well as the usual Markdown content, you can also specify more dynamic elements using Templater’s syntax (based on Eta).
Below are a couple of simple, one-line, examples. You can however make much more complex, or much longer, multi-line templates to meet your particular needs.
Example 1 - Daily Quote
This template inserts a daily quote from the quotes.rest API.
<% tp.web.daily_quote() %>
Example 2 - Tomorrow Link
This template combines some plain text with some Templater syntax to create a link to a note with tomorrow’s date stamp.
[[<% tp.date.now("YYYY-MM-DD", 1) %>]]
Inserting a Template
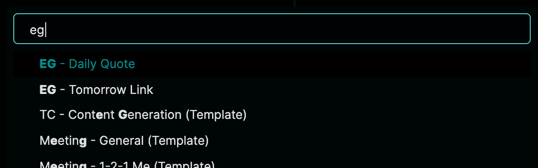
You can insert a template at the current cursor position by triggering Templater and selecting the desired template from the list of those available in your templates folder structure.
The first method you can use to trigger Templater is by selecting its icon in the navigation.
![]()
This will display a list of templates which you can search by typing in some key letters.
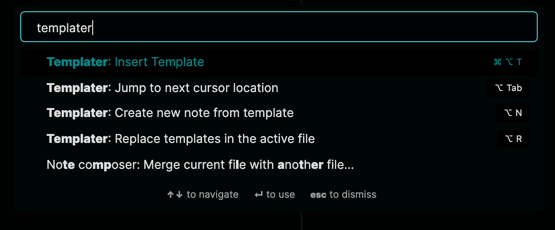
You can also, like any command in Obsidian, access Templater commands from the command palette. The command you want is “Templater: Insert Template”. There are also other Templater commands here that you may also find useful, but I find myself using the insertion command the most.
However, my preferred method to trigger template entry is to use a keyboard shortcut. You can set-up your own keyboard shortcut for inserting a template by navigating to Settings > Hotkeys, filtering for “Templater”, and specifying a keyboard shortcut for “Templater: Insert Template”.
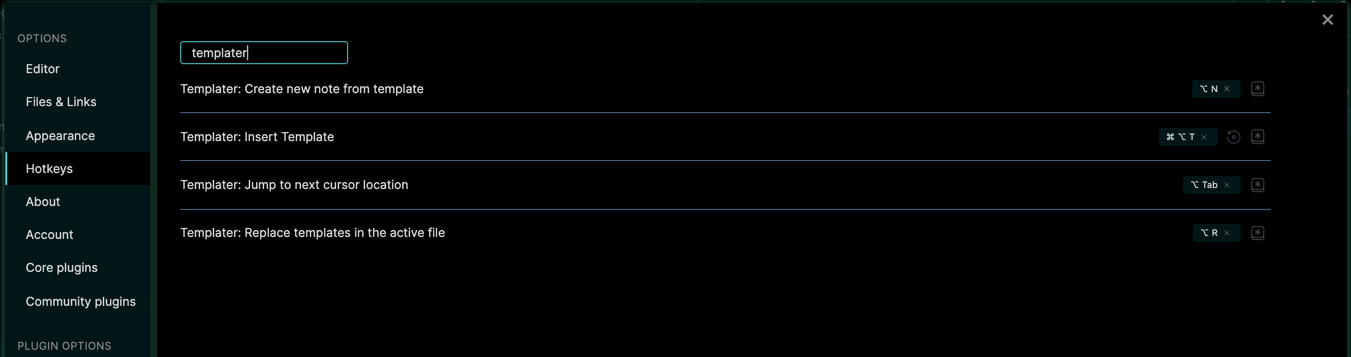
Above is how my demo vault looks on my Mac, where I have ⌥ ⌘ T set as my keyboard shortcut for insertion.
When you trigger an insertion and select a template to insert, the template is evaluated (unless you specify in the template’s syntax for it to not do that), and inserted in the current note at the current cursor position.
Conclusion
I hope this walk through is able to get you set-up with Templater and that you enjoy the productivity boost using this plugin brings.