The Badger 2040: Set Up
29 Apr 2022As soon as I had attended my first external work event and been issued a cheap paper badge, I began wondering why conference organisers were not using digital badges using eInk technology. I figured it was probably because people would “accidentally” leave the conference with them and they would be more expensive than the cheap paper print out in a plastic wallet on a lanyard. But, within a few years, eInk badges began to appear, and I felt things were catching up. Roll on a few years and I began attending public and private business-related events where people were not issued badges. Again I wondered why people were not issued badges, beyond the occasional sticky label that leaves a not so delightful slightly sticky patch on your business attire?
It was around this time, almost a decade ago, I began dipping in and occasionally looking around for an eInk badge option of my own. I often saw ones available from Chinese marketplaces, but they were typically vaguely specified, only available in bulk and thus expensive for an individual to experiment with.
Then several weeks ago I spied something new that looked ideal. I purchased a Pimoroni Badger 2040.
What is the Badger 2040?
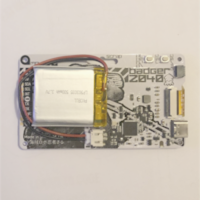
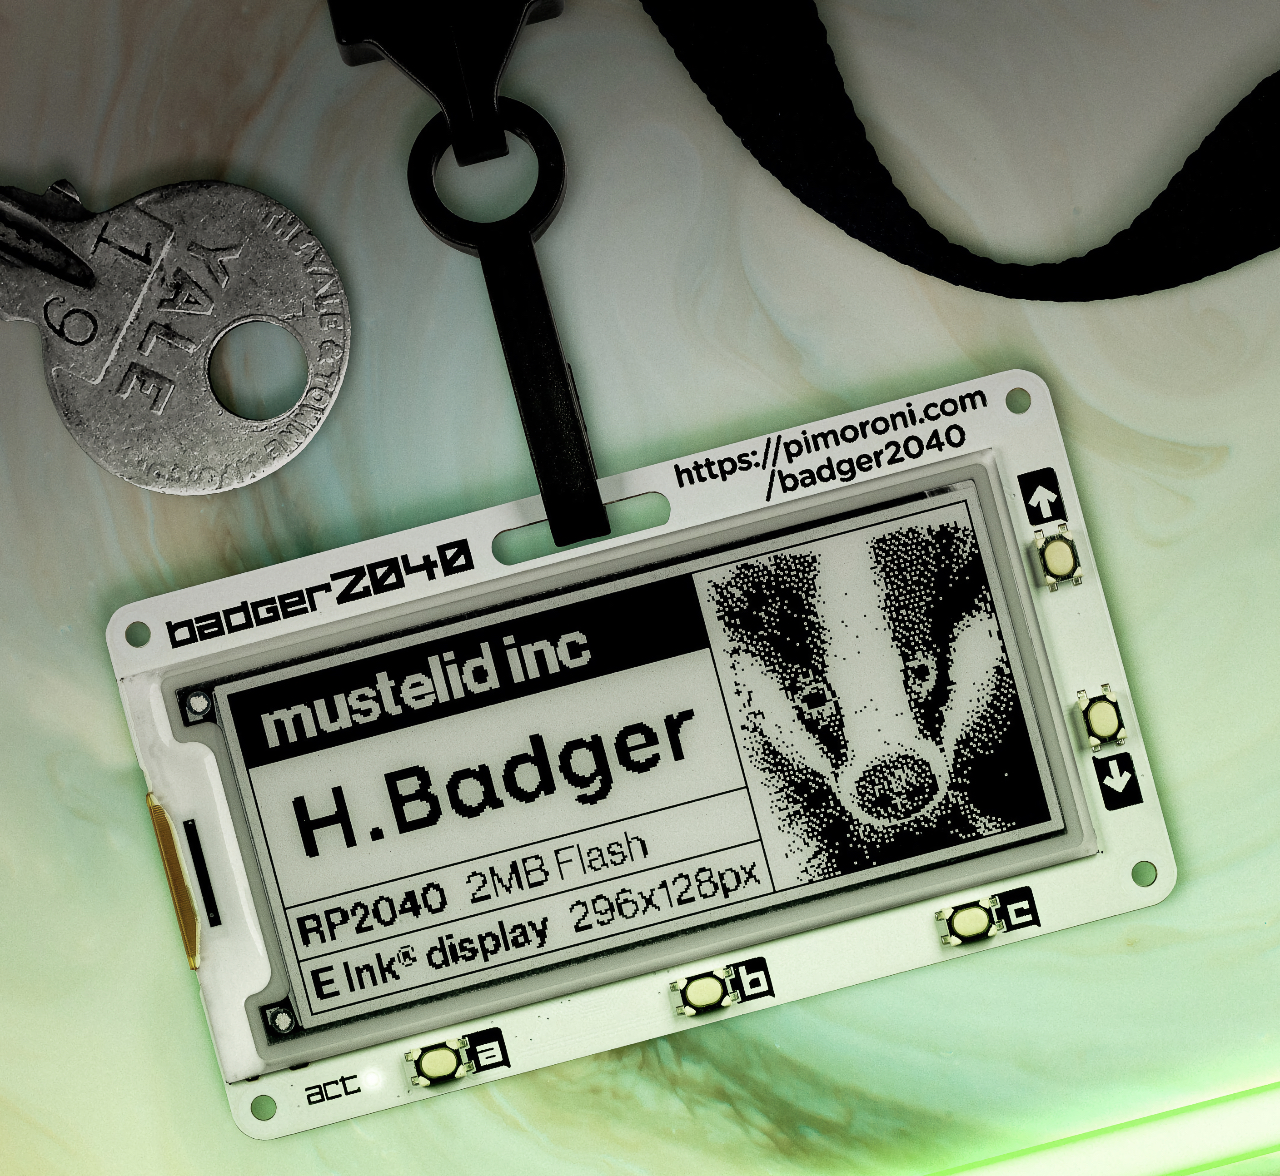
The Badger 2040 is a small eInk display on a board wired up to a Raspberry Pi 2040 microcontroller. Think of it as a tiny, low power, super bare bones Raspberry Pi. The board is the same sort of size as you might see for an ID badge, and by now, you can see how it got its name.
The Badger 20450 is a product of UK-based Pimoroni, based a little further south in Yorkshire than me, in Sheffield. It costs £12, but there is also a starter set which costs a little more and various other items you might consider as accessories. In my next post I’ll be following up with what additional things I put together to make my Badger 2040 more useful to me.
First Experiences
I have to admit that my first experiences with the Badger 2040 were a little frustrating. There were no instructions available for the product, and even after piecing together things from various RP2040 focused articles and stumbling across Pimoroni’s GitHub repository for RP2040, I still fell afoul of a number of firmware issues and oddities.
The thing was that I got this product at launch and Pimoroni were running behind on their launch preparations. Within a few days I had loaded a new firmware version which fixed most of the issues, and this was then followed by an excellent introduction tutorial being released by Pimoroni’s Hel Gibbons.
Getting Started with Badger 2040
Based on my experiences, I’m going to give you a few tips on getting started with the Badger 2040.
Step 1 - Read the Tutorial
The first thing to do is to go and read the official tutorial. While I had already figured out the vast majority of what it covered by the time it came out, it is presented logically and makes the whole solution much easier to follow. But, what I would suggest is to only read the tutorial and not do any of the practical elements just yet.
way to everything Badger 2040, as well as giving you a local self-contained Python environment, which will also be useful.
Step 2 - Update the Firmware
The firmware that comes by default on your Badger 2040 is almost certainly going to be out of date, so the first thing that you want to do is to update it. This begins with downloading the latest version of the firmware from Pimoroni’s GitHub repository.
The file you want to download will be something of the format pimoroni-badger2040-v#.#.#-micropython.uf2.
uf2 files are a format created for Microsoft’s PXT (Programming eXperience Toolkit) framework and is how you can update the core system being run by the Badger 2040 via it’s bootloader.
I would also suggest grabbing a copy of another firmware uf2 file that can be used if you run into any serious issues - which has happened to me just once so far, and that was early on.
Loading this firmware will purge the existing system and you can then apply your desired firmware afterwards. Usually this is unnecessary, but if you get any fatal errors or total lack of response after a firmware update, then this may be required.
To load new firmware onto the Badger 2040, follow these instructions:
- Plug the Badger 2040 into your computer. The Badger connects via USB C, but you can connect it to a USB A or USB C connection with an appropriate cable.
- On the back of the Badger 2040 are two buttons - BOOT/USR and RST. Hold down the BOOT/USR button and at the same time press and release the RST button, then release the BOOT/USR button. This tells the onboard RP2040 to reset and start the bootloader.
- Once in bootloader mode, the RP2040 should appear as an external mass storage device on your computer.
- Copy the
uf2file for the firmware you wish to apply, to the RP2040. - Once the copy is complete, the RP2040 bootloader will trigger an automatic reset. The RP2040 will no longer appear as a mass storage device, and the Badger 2040 will now be running with the firmware you applied.
Hopefully, you now have the latest firmware in place and you are ready to get tinkering.
Step 3 - Get Thonny
If you don’t have it already, the next thing that you are going to need to do is to go and get the latest version of an application called Thonny - a Python IDE (Integrated Development Environment). Thonny is able to “talk” to the RP2040, so this is going to be your gateway to getting the Badger 2040 to do what you want it to, as well as getting files on and off the device.
Step 4 - Connecting with Thonny
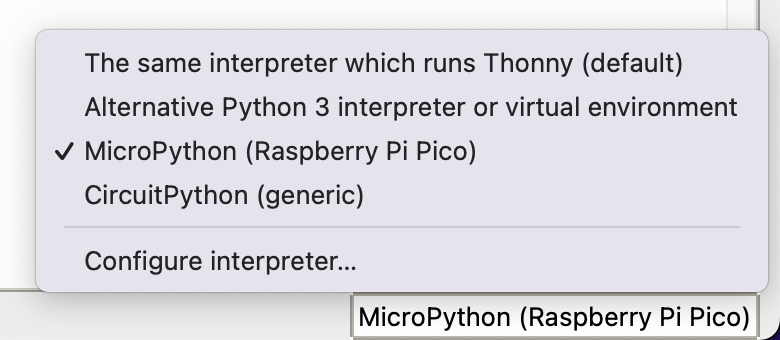
Because the Badger 2040 only appears as a mass storage device when in bootloader mode, we need to use Thonny to communicate with it directly. Your Badger must be cabled up to your computer, and when you open Thonny, the first thing you should do is check the interpreter in the bottom right corner of the screen. The current interpreter is shown in the status bar, but if you select it, it will display a menu that allows you to change it. To talk to the RP2040 on the Badger 2040, you want to have it set to “MicroPython (Raspberry Pi Pico)”.
When it is working correctly, if the Files option on the View menu is enabled, you should be able to see file listings for both the local computer and your Badger 2040’s RP2040. If it isn’t working, you will probably see something like this:
Device is busy or does not respond. Your options:

  - wait until it completes current work;
  - use Ctrl+C to interrupt current work;
  - use Stop/Restart to interrupt more and enter REPL.
If you see this follow these two steps:
- Press and release the RST button on the Badger 2040.
- Wait 2-3 seconds.
- Press the red circle with a white square button (last icon) on the Thonny toolbar to initiate a backend stop/restart.
Doing these things in this order I have found to be the most reliable. Typically just doing step 1 or step 3 is not enough. Likewise, doing step 3 too soon after step 1 just doesn’t give the RP2040 long enough to reset and ends up continuing with an error.
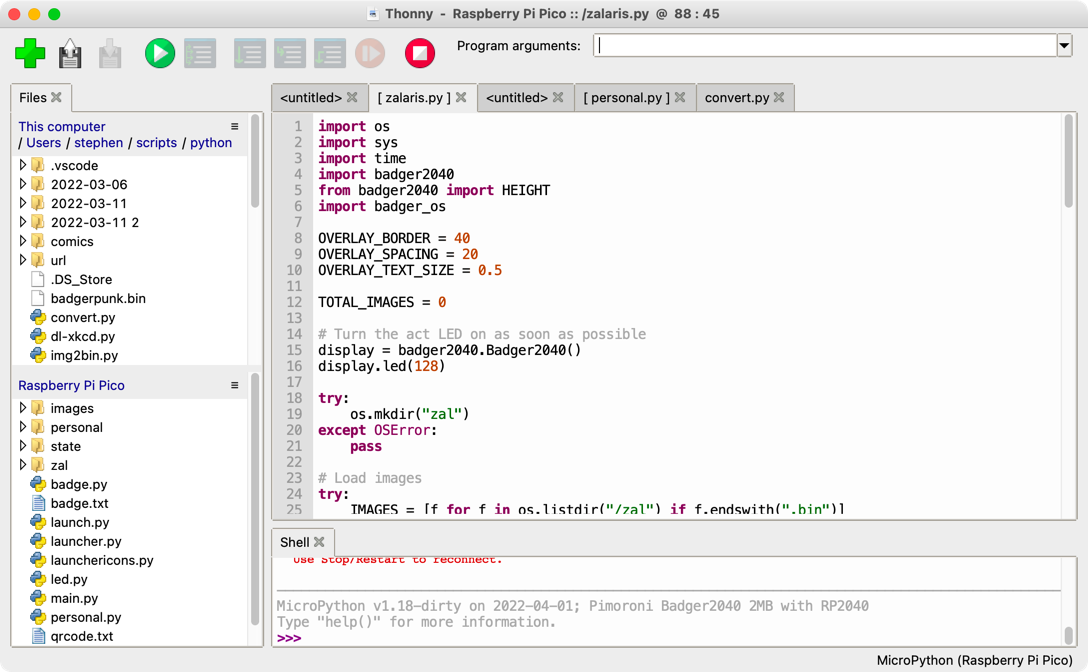
When it is working correctly, you’ll see your file listings and have a live shell prompt on the device:
MicroPython v1.18-dirty on 2022-04-01; Pimoroni Badger2040 2MB with RP2040
Type "help()" for more information.
>>>
Step 5 - Using Thonny
Next, I have a few tips for using Thonny with your Badger 2040.
Below is an example view of how my Thonny set up might look when I am working with the Badger 2040.
5.1 Creating a Directory on the Badger 2040
You will probably want to create your own folder structure on the RP2040 to keep your resources organised. To do this, you will inevitably need to create your own directory structures. When you want to create a new directory, navigate to the parent directory you wish to create it in on the RP2040, and then right click on a blank area to get a context menu with an option to create a New Directory.
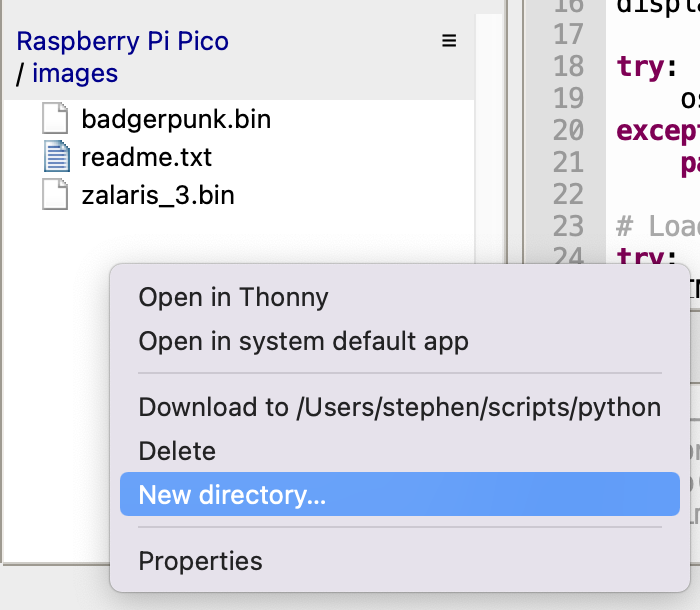
Enter the name of the directory to create, and Thonny will then send the instruction to create the directory. Note you will not automatically navigate into that directory.
5.2 Deleting a File/Directory on the Badger 2040
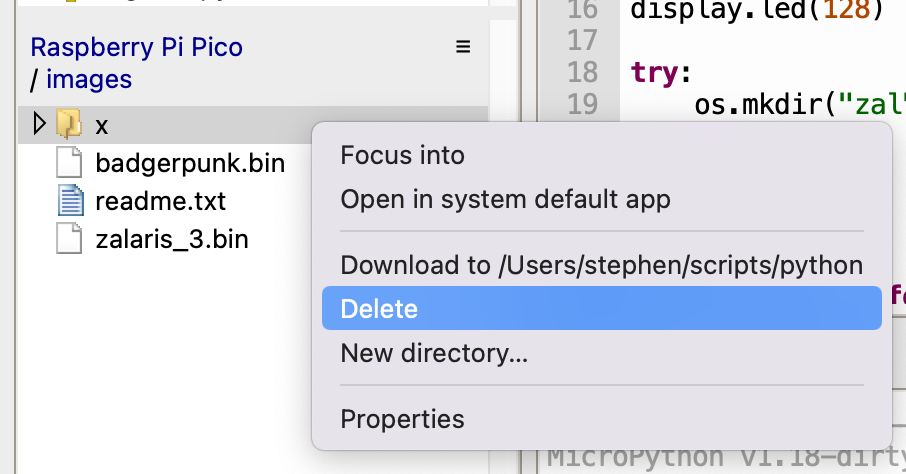
Deleting a file or directory on the Badger 2040 simply involves selecting it in the file listing, right clicking for the context menu, selecting the Delete option, and then confirming the deletion - there is no option to undelete, so your backups are a key consideration when working with the Badger 2040.
5.3 Uploading a File/Directory to the Badger 2040
If you want to upload a file to the Badger 2040, navigate to the directory want to upload to on the RP2040. Right click on the file you want to upload and select the Upload to {folder name} option that is presented.
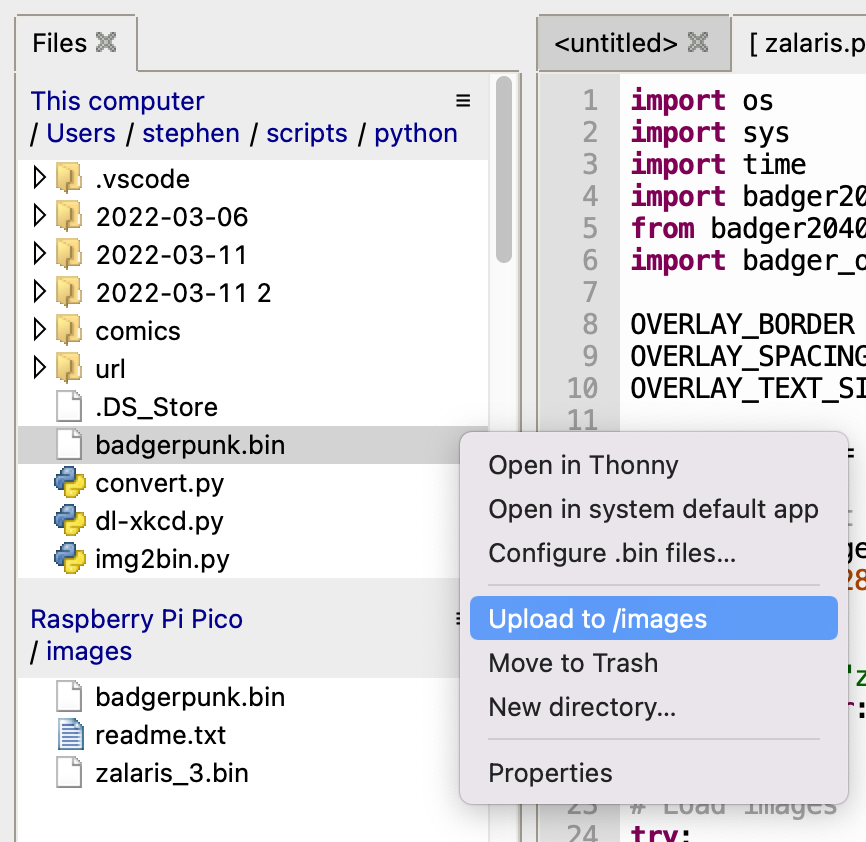
Selecting this will trigger a file transfer. The transfer will take a few moments if the file is large, but shortly thereafter, the file should appear in the listing on the RP2040. If it does not, and there are no error messages, navigate to a different directory and back to refresh the listing.
5.4 Downloading a File/Directory from the Badger 2040
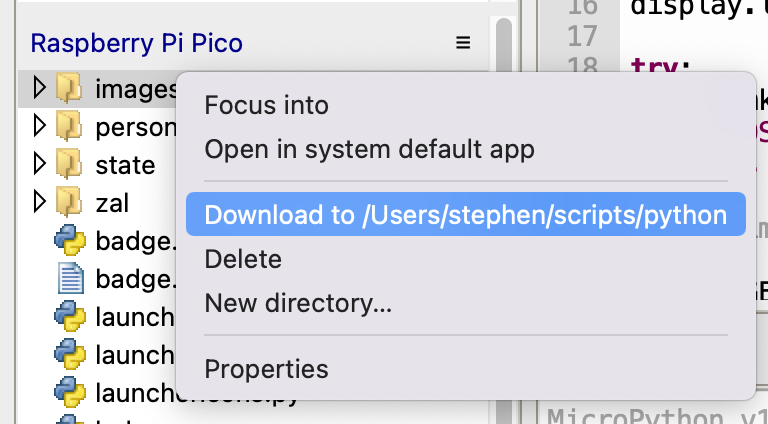
Just like uploading, there is a similar process for downloading. This time navigate to the location you wish to download to on the local computer. Next navigate to the file/directory you wish to download, select it, then right click for the context menu. Select the Download to {folder name}, to trigger the download.
5.5 Edit a File in Place on the Badger 2040
To edit a file in place on the Badger 2040 (i.e. foregoing downloading, editing locally and uploading), you can just double click on a file on the Badger 2040 and it will open in a new editing tab. Modify the file and then save to save the changes back to the file on the Badger 2040.
5.6 Run a Python Script on the Badger 2040
While you can use the whole launcher navigation (the default base script in the firmware that runs after boot up that then provides icons to trigger other scripts), you can also use Thonny to tell the Badger 2040 to run a script directly, which is very useful for testing.
You can do this with local scripts, or scripts on the Badger 2040. Just open them in a tab in Thonny. With that tab active, select the Run Current Script button (a green circle with a white triangle on the Thonny toolbar).
Step 6 - Get the Example Code
A strange thing about the RP2040 is you don’t see the code it is running in Thonny. It’s a strange concept to me, but that’s how it is. If you want to change the behaviour of a Python script, you can’t edit the standard one per se, you have to upload it, and it will then override the one deployed with the firmware. The question then is how do you know what is in it? Well, that’s where we can reference Pimorioni’s GitHub repository once more.
- Badger2040 Examples - the Python scripts for the firmware.
Copy the scripts so that you can modify them and produce your own.
Step 7 - Use the Tutorial
At this point:
- Your Badger 2040 is up to date.
- You can access the Badger 2040 using Thonny.
- You can use Thonny to set up and modify what the Badger 2040 will do.
- You know where to find the code base and examples.
At this point, I think a second, more hands on look at the tutorial is worthwhile. As I noted above, I think that the tutorial is great, but I also think that for a new user, the steps and insights above will help round it out and mean that you will be less likely to encounter issues you are unsure how to deal with.
Summary
Hopefully, you should now be in a strong position to start investigating what you can and cannot do with the Badger 2040. Everything should be set up, and I have shared some pointers on where to find some additional information.
I have a few more things to share about my Badger 2040 use, and in my next post I will be covering some more about the physical additions I have made to it in order to make it functional for my own needs as a digital badge.