Pseudo Functions in Alfred Workflows
29 Feb 2024Recently, while working on a new Alfred workflow, I found myself once again wishing that Alfred workflows supported subroutines or functions. Something that would give me better reuse of chunks of my workflow so I could keep things as a single source. For the most part I rely on using a single script for this kind of work, but sometimes a script alone isn’t the best way to do it, rather multiple workflow steps would provide a better result. After thinking it through and tinkering, I came up with a solution that worked and I have since put into practice. A kind of pseudo-function approach if you will.
The Premise of the Pseudo Function
I don’t feel right referring to my approach as a function as it takes a bit more effort and direction than would be expected from a typical implementation of functions. What I have operates like a function but isn’t quite, so I landed on ‘pseudo function’ as a better expression for what it really is.
The problem with Alfred workflows is that they are generally quite linear. You can make recursive flows, and these work well, but not everything can be built so easily with a recursive flow and sometimes you want to be able to jump in from anywhere, do your operations and then jump back where you came from.
The way I solved this involves passing a piece of information to the pseudo function that lets it know where to go when it has finished. As a result, we need to add in a bit of extra effort to make things work how we want. We have to create a place to come back to, and we have to additionally pass that place to the pseudo function such that it knows what to do with it.
An Example Workflow
Rather than try and explain it all in abstract terms, I have put together an example workflow. There is a screenshot of the overall workflow below, and you can download it here.
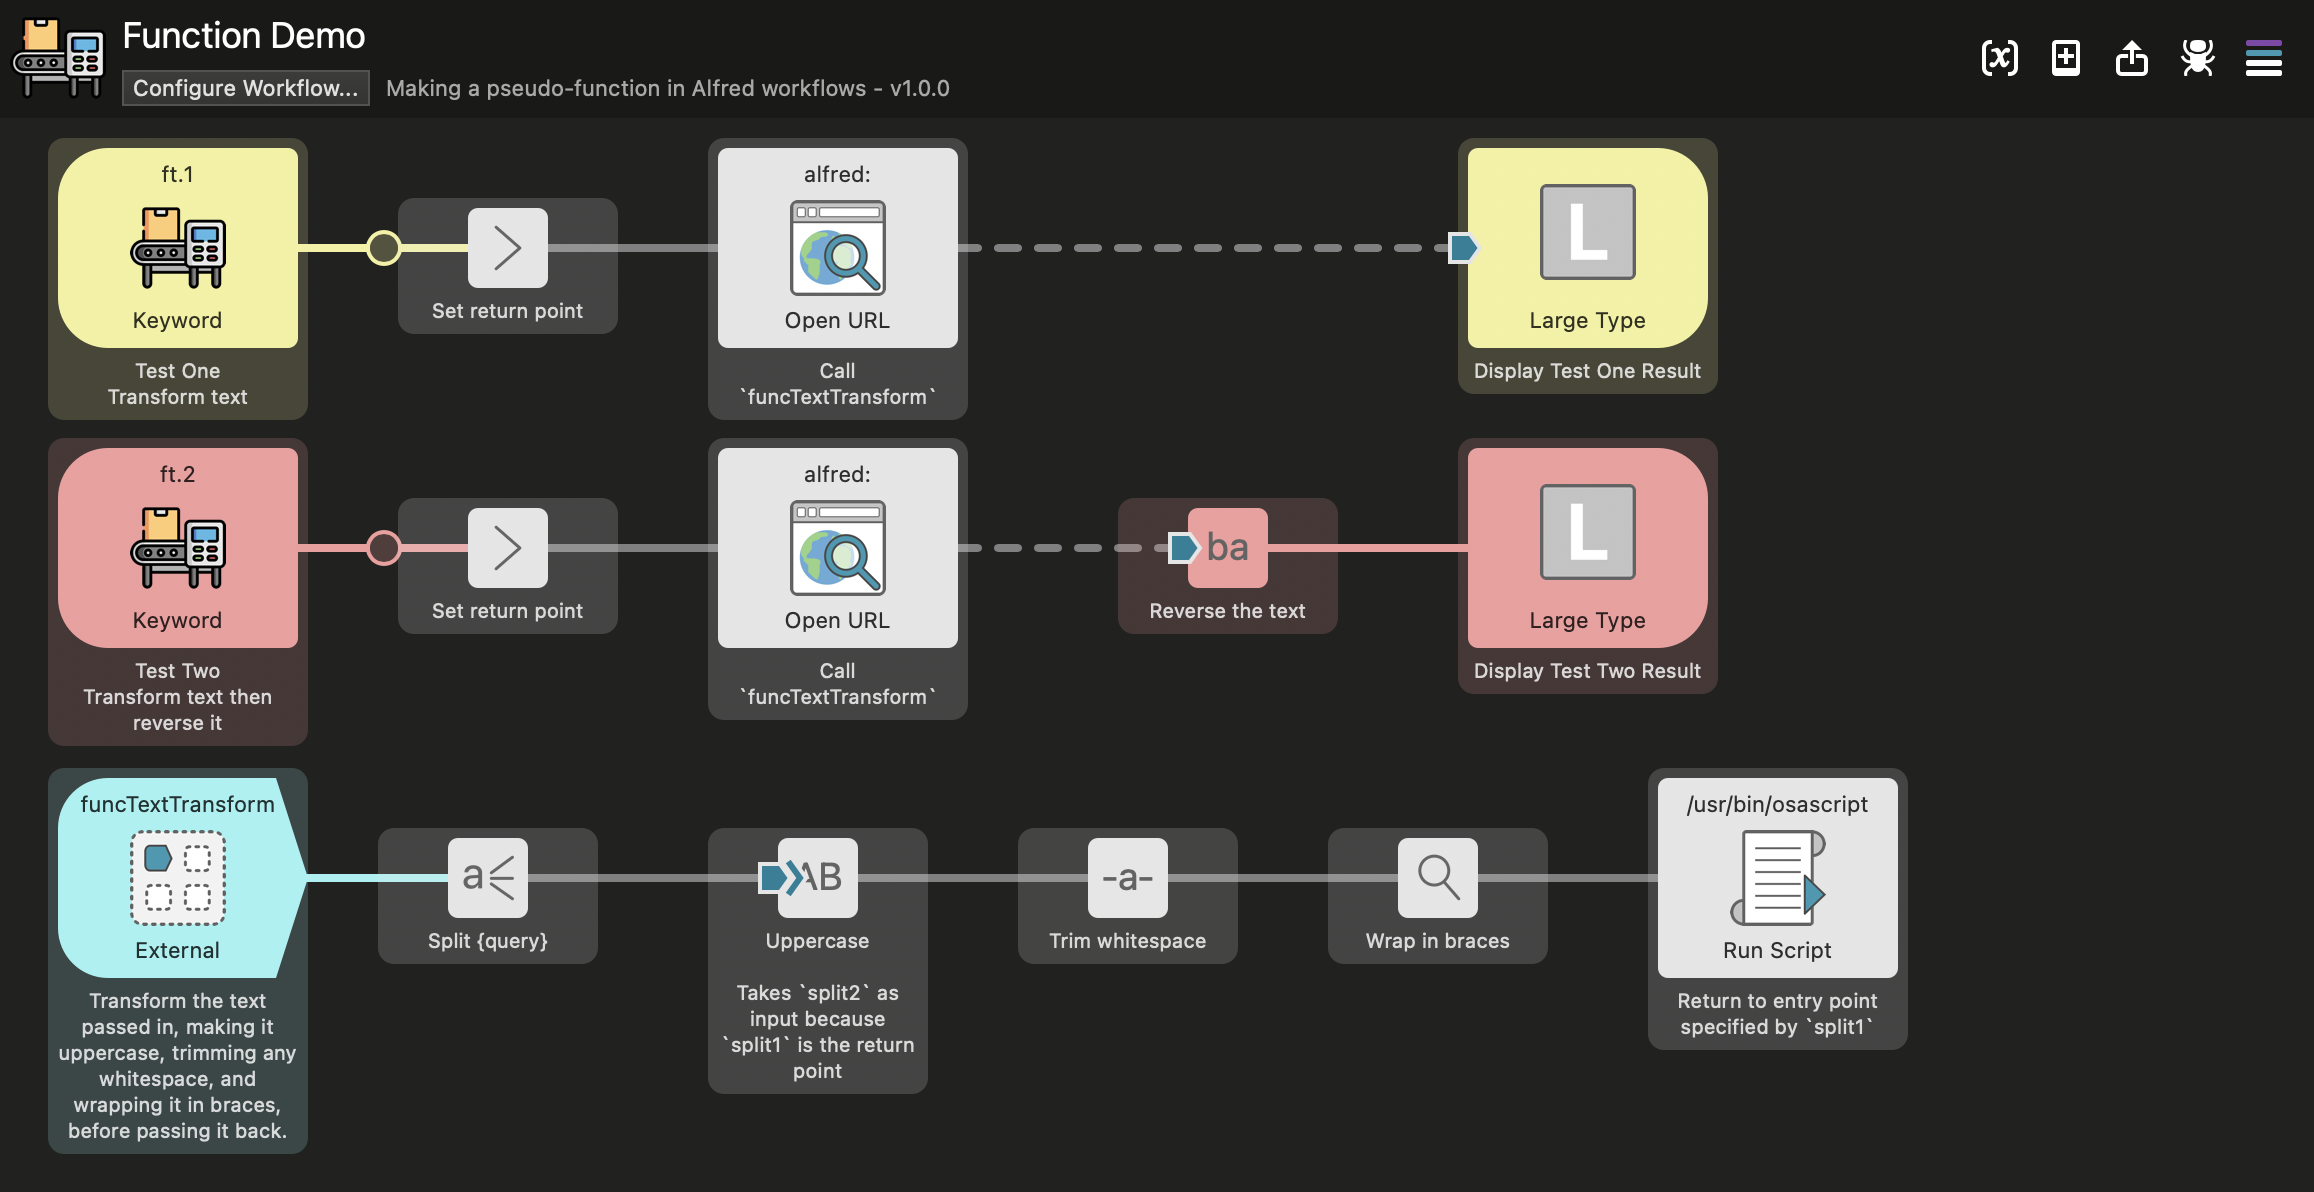
The workflow consists of three flows. The first two flows are triggered by keywords and each allows the user to enter some text, then process that text via a pseudo function, and finally display a result. The second flow differs from the first by including a step to reverse the transformed text, and both flows also display the results with different colour backgrounds. The third flow is triggered by an external call and carries out multiple text transformations before using a script to return the result to the flow it was called from, or rather where the calling flow has instructed the return to occur.
To see how this all fits together, lets examine the different flows.
Flow: Test 1
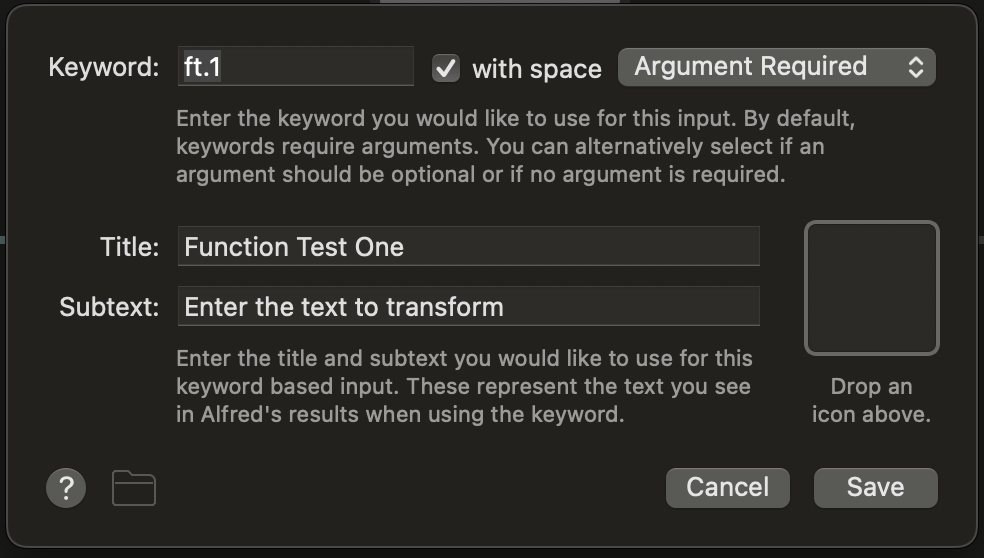
Once the workflow has been installed, this flow can be triggered in Alfred via the keyword ft.1 being entered, and it expects the user to type in some text to be transformed.
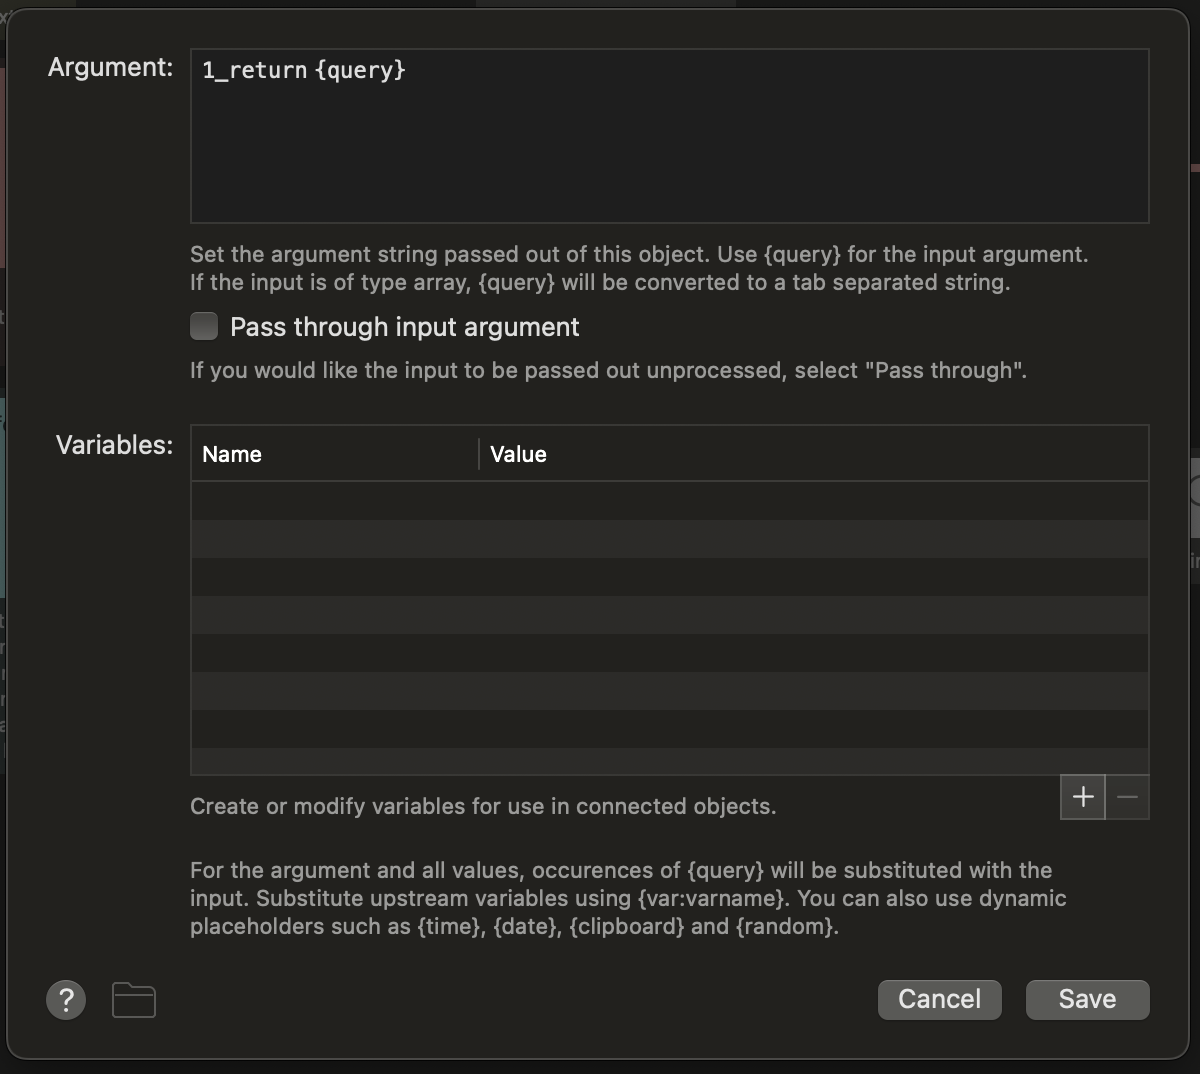
Once entered, the next step in the flow is to prefix the entered text (held by the {query} variable) with the name of a location for the function to return to followed by a tab character. Here we have give a location of “1_return”, but that’s just because I wanted to be really clear that this was the return into the first flow - you can and probably should be more creative with your naming if you choose to use this in your own workflows.
The third step opens a URL, which is what makes Alfred skip from this flow to the third flow.
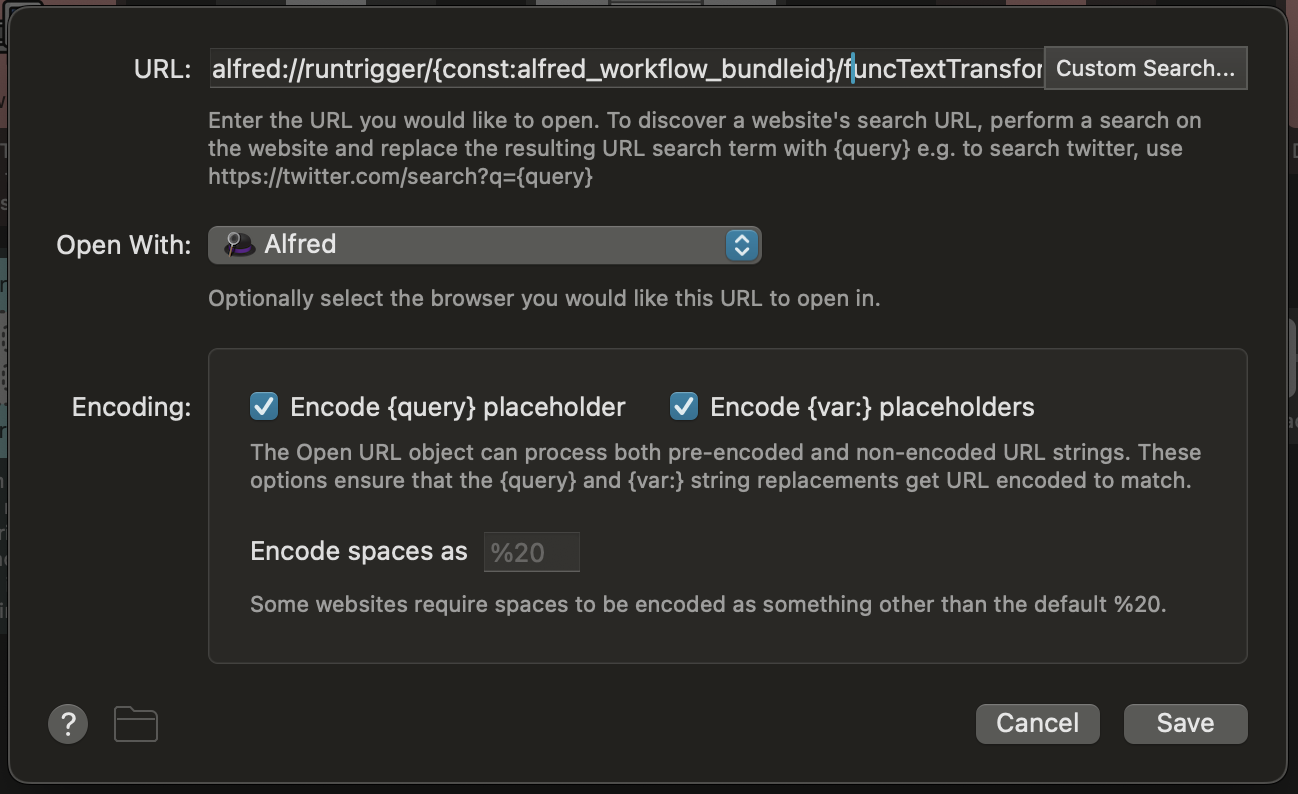
Because that is an external trigger, and because the URL call for it has been enabled, we can use a URL to make the jump. Now, the content of the URL is not exactly what the external trigger provides. The full URL is shown below.
alfred://runtrigger/{const:alfred_workflow_bundleid}/funcTextTransform/?argument={query}
This breaks down as follows.
alfred://runtrigger/- is the schema and action to initiate.{const:alfred_workflow_bundleid}- is a variable that holds the workflow’s bundle ID1.funcTextTransform- is the name of the external call to be triggered.?argument={query}- is the argument to pass on - i.e. the return location and the entered text, separated by a tab character.
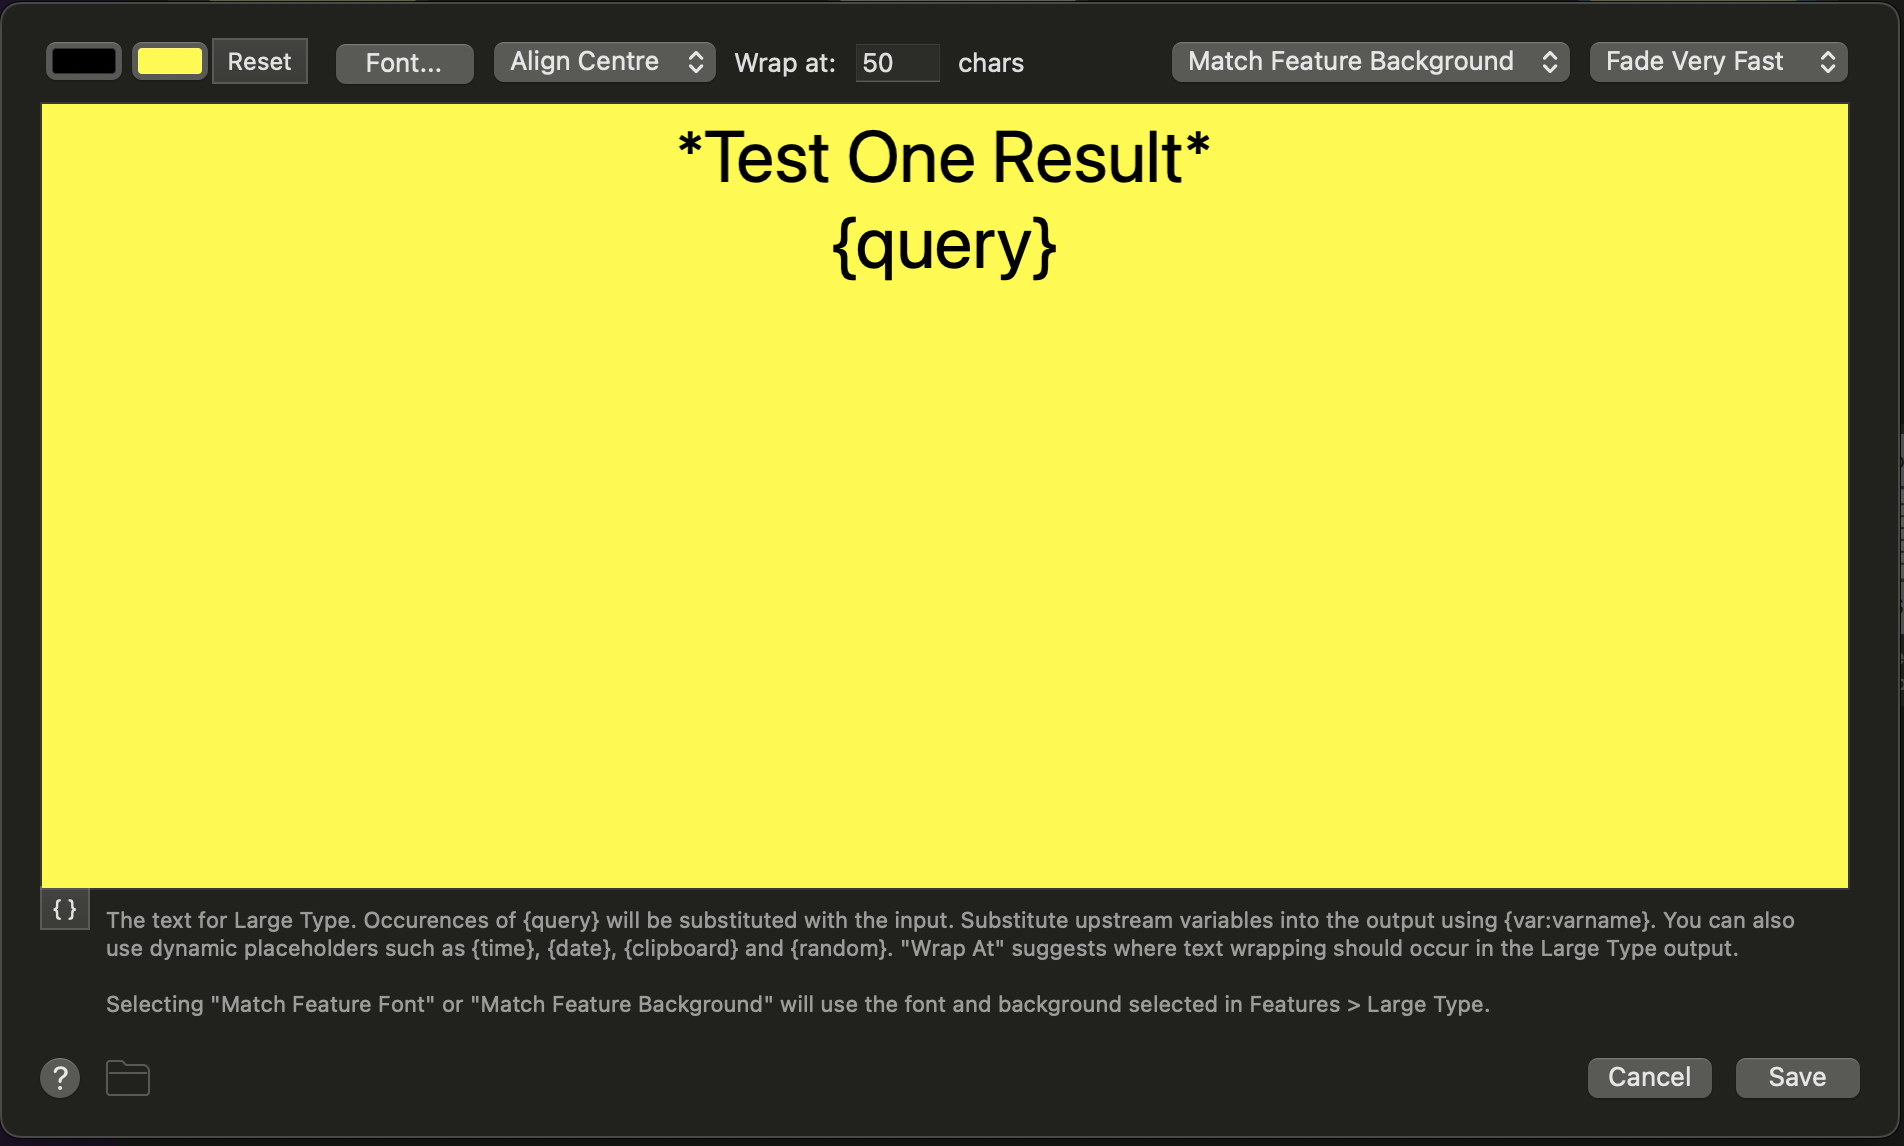
The fourth step is set up to display the result on a yellow background.
However notice that the line between the third and fourth blocks is dotted. That is because this link is disabled. It does not do anything other than give us a visual indication of there being a relationship between the two blocks. Note also that it ends in a square-sided pentagon. This is an indicator of customised inbound configuration.
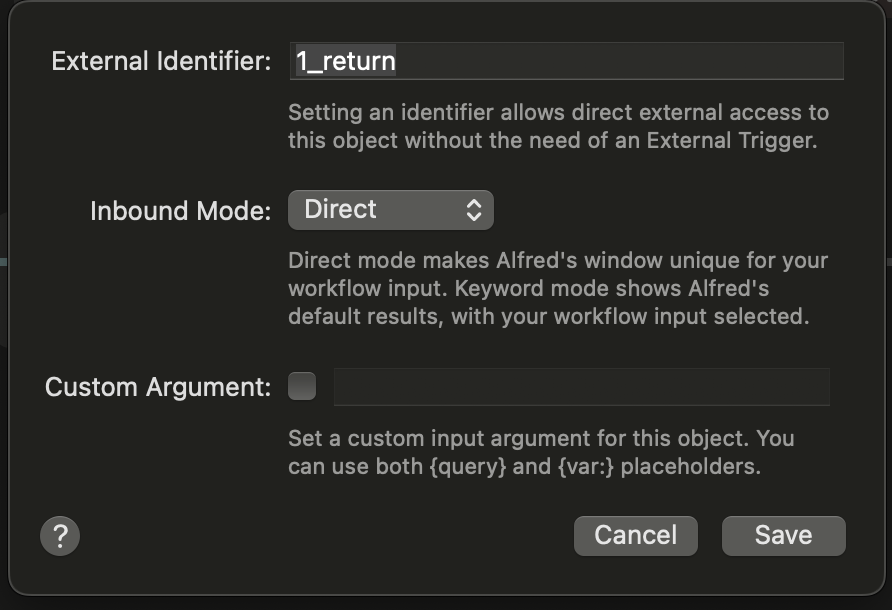
This is how we are able to give the pseudo function a return point. Remember we prefixed 1_return earlier? This is where we use that to denote the location.
Flow: Test 2
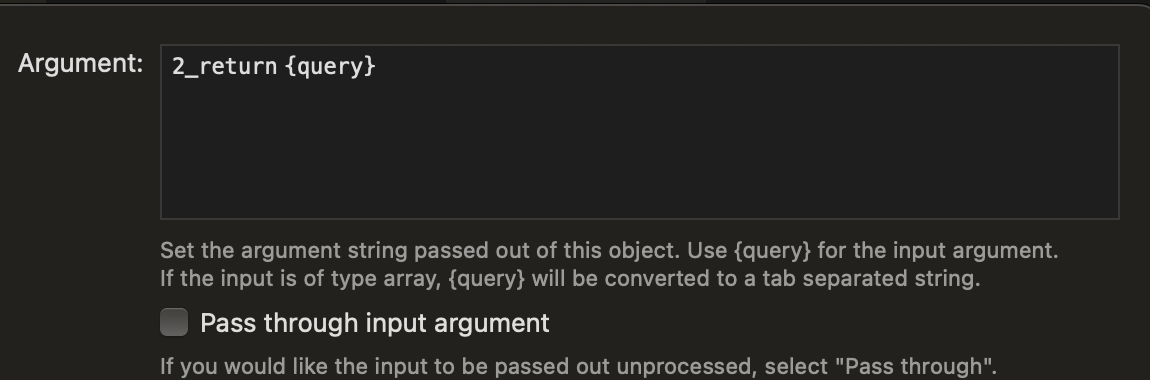
This is very similar to the first flow. It has a trigger keyword of ft.2, and uses the same URL, but it specifies a different return point name (2_return as this is the second flow) in step 2 …
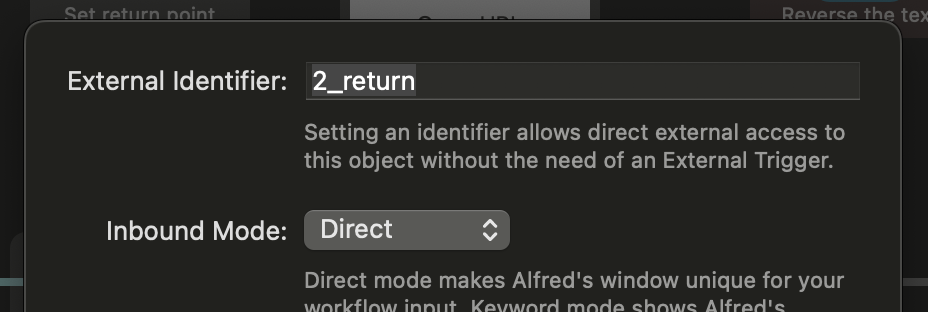
… and the inbound configuration for step 4.
Step 4 is also a text reversal block rather than a display block, step 5 being the display, and this time set to display on a red background.
Flow 3: The Pseudo Function
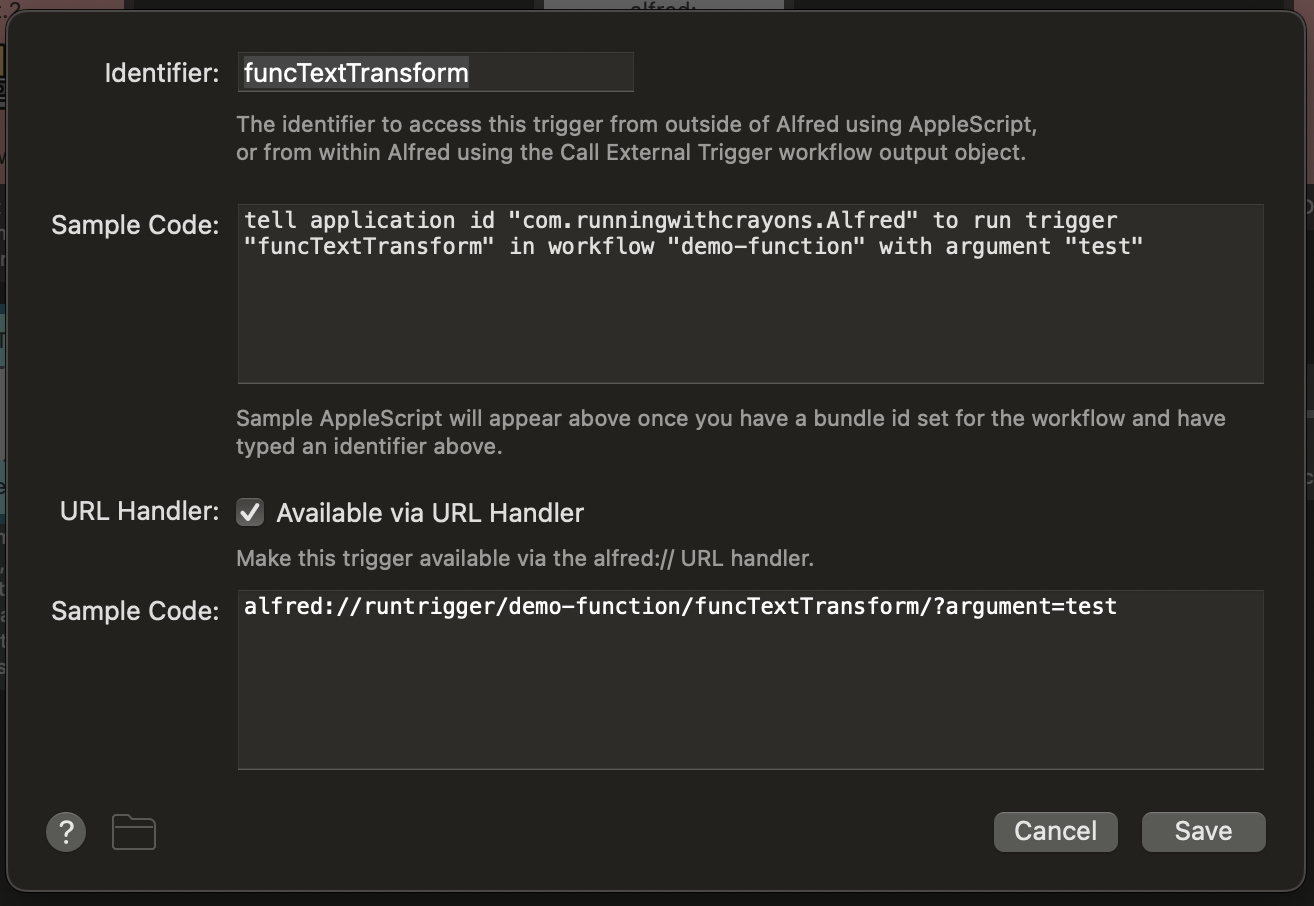
In the first step of this flow, we can see funcTextTransformation is the identifier for the external call, and this is what we used in the URL to call this flow. You can also see here how my earlier URL differs from the example, but that the URL handler checkbox is ticked. That is very important because otherwise we would be using AppleScript to do the call each time, and I opted to go for what I think is the simpler solution. Admittedly, there’s not much in it in terms of the relative complexities.
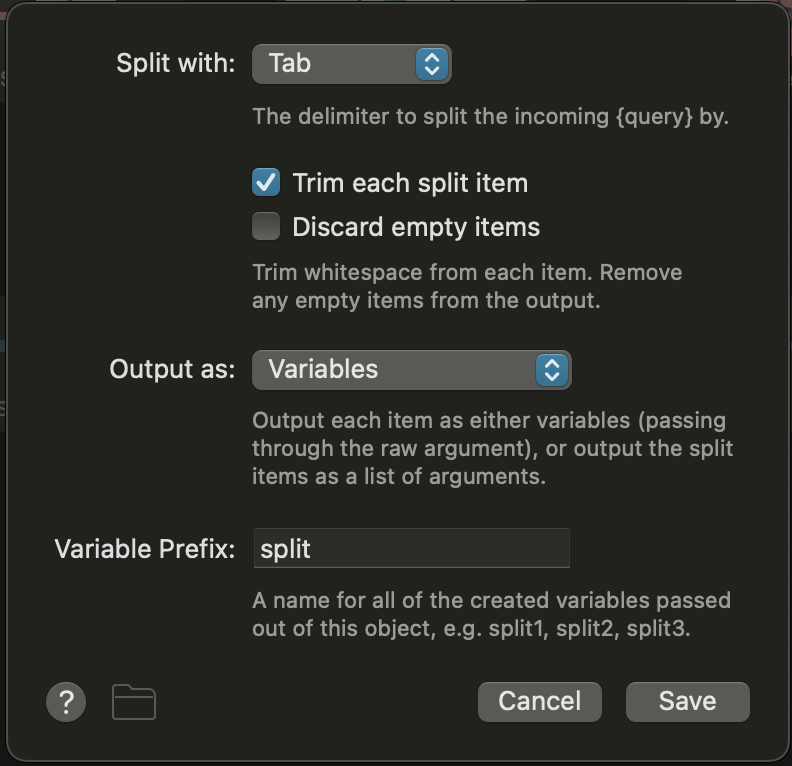
The second step splits the input into two variables by splitting on the tab character. This means that in the variable split1, we have the name of the return point, and in split2, we have the text to be transformed.
Steps 3, 4, and 5 are transformation blocks that converts the input to upper case, trims off any extraneous white space, and then puts the transformed text between curly braces. This is the “function-bit” of the flow and is where you do whatever it is you want your pseudo function to do.
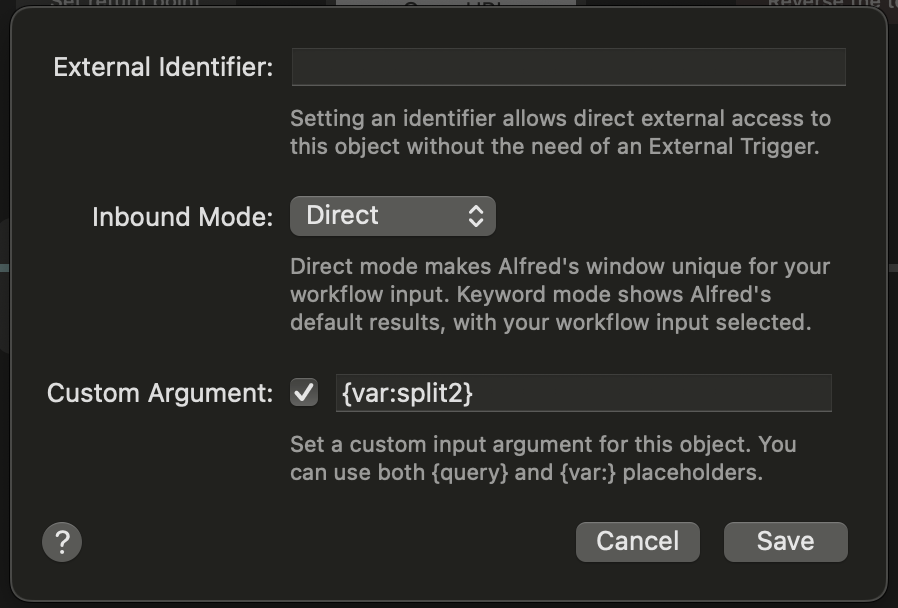
One thing to point out is that the first step gets a customised inbound configuration in that it receives the content of the split2 variable as its input.
The final step is an AppleScript to return us to the desired point in the calling flow.
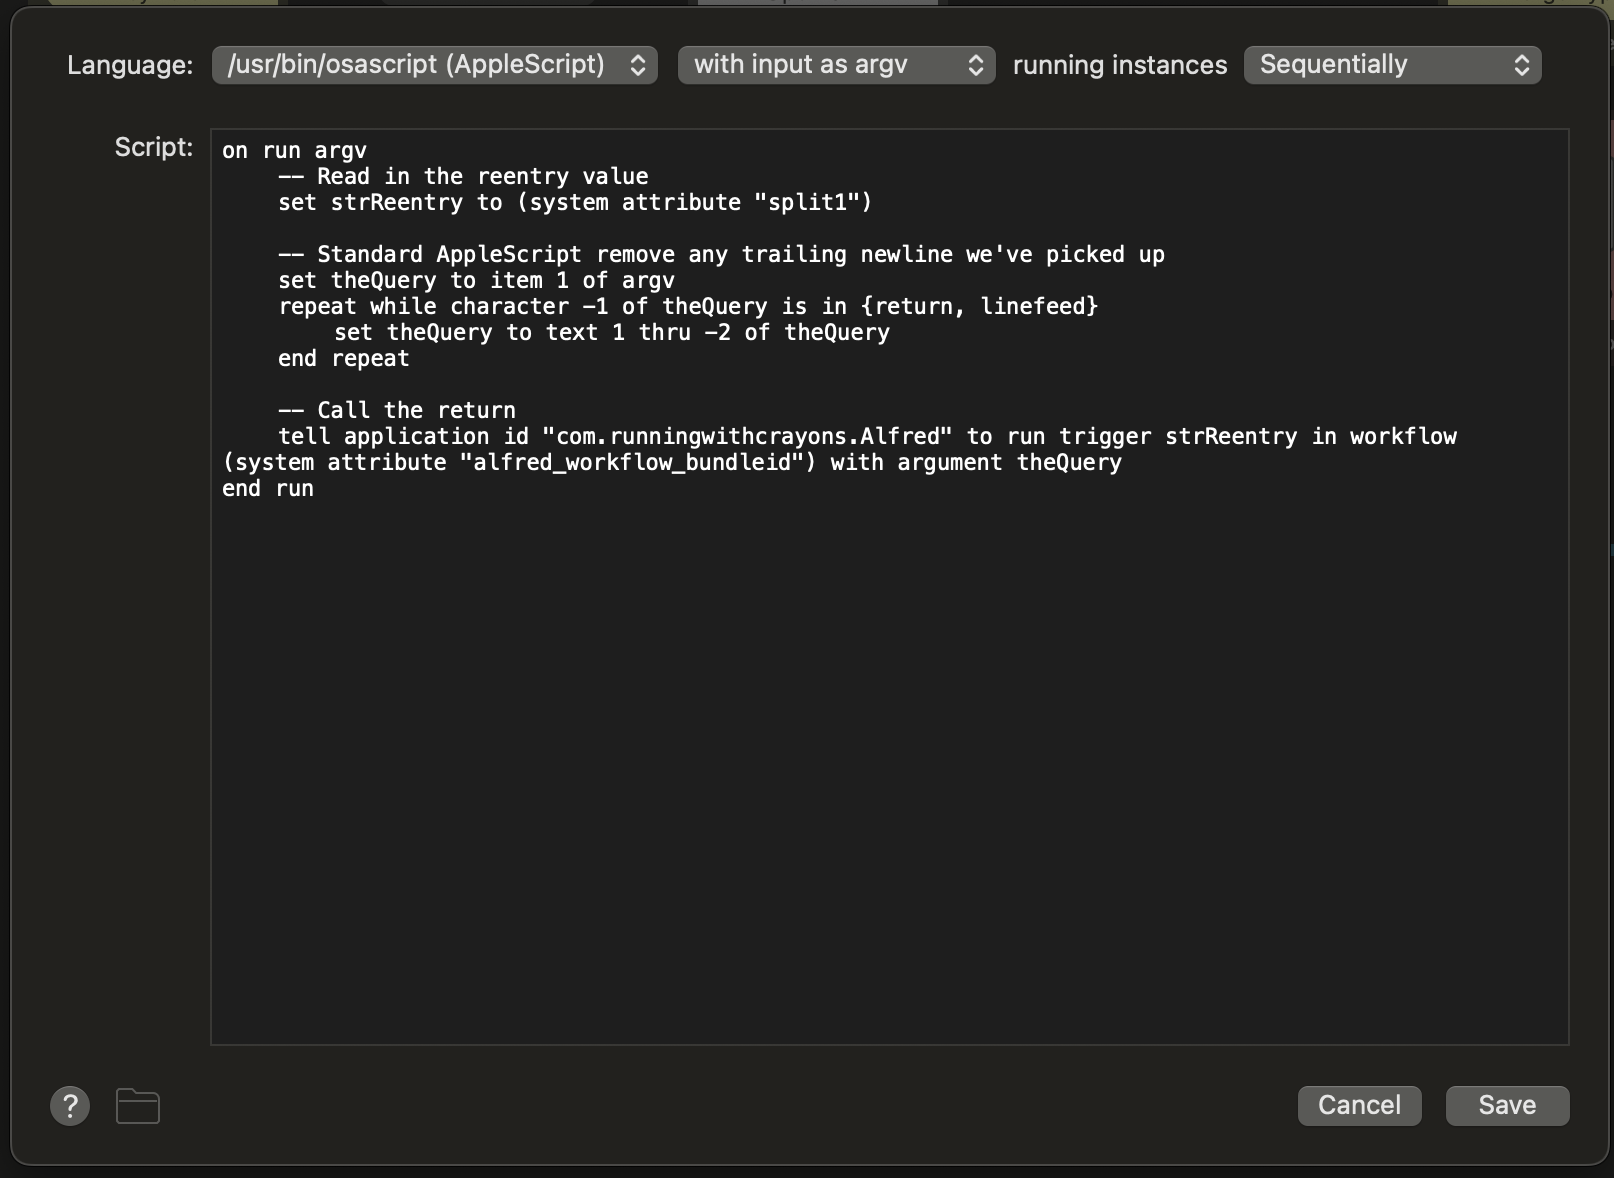
The content is fairly generic, so this can be reused. It takes the re-entry point from the split1 variable (not the input), trims any trailing newline from the input, and then calls the external trigger for the re-entry point, passing with it the trimmed input to the script.
on run argv
	-- Read in the reentry value
	set strReentry to (system attribute "split1")

	-- Standard AppleScript remove any trailing newline we've picked up
	set theQuery to item 1 of argv
	repeat while character -1 of theQuery is in {return, linefeed}
		set theQuery to text 1 thru -2 of theQuery
	end repeat

	-- Call the return
	tell application id "com.runningwithcrayons.Alfred" to run trigger strReentry in workflow (system attribute "alfred_workflow_bundleid") with argument theQuery
end run
A Test
Entering ft.1 lorem ipsum into Alfred to trigger the first flow, we get the pseudo function only transformation, and the text is displayed on a yellow background.

Entering ft.2 lorem ipsum into Alfred to trigger the second flow, we get the pseudo function transformation followed by a reversal of the resulting characters, and the text is displayed on a red background.

In each case, the same text transformation occurred, but in each case the pseudo function returned control of processing back to the next step in the calling flow.
Conclusion
Alfred workflows are visual coding. Being able to build reusable sets of code is something that allows you to maintain a single source and develop solutions more quickly. As noted, using scripts gets you a long way towards this level of reusability, but sometimes being able to use flows within your workflow in this way is really valuable.
I have already used this technique successfully with a more complex workflow, and I fully expect to be making more use of it in future until such time as an easier option presents itself. If you find a need for this sort of structure within your workflow, hopefully this walk through will help you in adding your own pseudo functions.
-
I have a tendency to change my workflow’s bundle ID during development as I change the names, so using this variable saves me from breaking things. ↩