Home Assistant Matrix Display for Indicators
27 Apr 2024Where I live we have three types of waste collection. One week we get our refuse collected and the next week we get our recycling collected. For about eight or nine months of the year we also get garden waste collected along with the recycling. I have linked up my Home Assistant instance so that every week, the night before collection I get a notification on my mobile phone as to what is being collected the next day. It has worked great, but I often found myself having to open the Home Assistant app on my phone and find what the collection was going to be ahead of time. As a result I decided I would like to have some sort of visual indicator in my kitchen to let me know what collection was due next. In this post I am going to set out my little journey and what I ended up with.
Background
I was delighted last year when I discovered the community integration called Waste Collection Schedule. This is an integration you can add to your Home Assistant instance via HACS, the Home Assistant Community Store. This allowed me to surface my local waste collection services (after I appropriately configured the integration) as an entity in Home Assistant, and specifically access a sensor definition for what the next waste collection will be.

I figured that having some sort of simple LED based indicator in my kitchen next to the back door would be ideal as that is where we have our kitchen bin and recycling.
Hardware
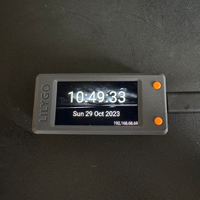
I have a couple of information display on my desk that I have written about in the past, that are based on the LILYGO® T-Display-S3 ESP32-S3. A desk clock, and an information display. However these are more suited to graphics and text. They would be overkill for what I was looking for. Really all I was looking for was an LED to light up.
An ESP32/ESPHome-based solution seemed logical as I could reuse a lot of the principles of the information display to change the output based on a helper entity on the Home Assistant side that I could set based on the output of the waste collection sensor.
I have some spare ESP32s available, and some LEDs, wiring those up, 3D printing a case from my rather poor 3D printer I decided was something I could address by spending a little bit of money to get something a little bit nicer.
I have been really impressed by the M5Stack ATOM series of ESP32 devices. They are modular, nicely presented and offer a range of functionality in a tiny package. One of the options they have is the M5Stack ATOM Matrix ESP32.

Of course this has more than just one RGB LED so this inexpensive hardware actually opened up some additional options for me. I could display more than one piece of information (by separating the display into zones) or more complex information (e.g. a simple icon/character). It would also give me a chance to work with and learn a bit more about a different type of display, so this was the option I went for rather than the barbaric 3D-printed monstrosity I would no doubt have otherwise ended up with.
Zoning
I decided in the end that there were maybe some other useful things I could give an indication of. We tend to use our kitchen door for entering and leaving the house, so I figured if I could give a glanceable indication of the main weather condition and temperature, that would be useful too. For that reason, the approach I decided to adopt was to split the 25 x 25 matrix of RGB LEDs into five zones. These are four quadrants and a grid (consisting of a simple central cross).
 |
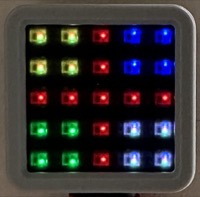 |
Each zone could represent different information, and different colours could then convey a different meaning, with multiple sequential LEDs making things easy to distinguish at a distance. In fact the cross I have chosen to typically leave unlit to really let the quadrants show distinctly, but if I find a need to convey something via the cross, my set up allows for that.
ESP32 Device Configuration
As noted above, the intention from the start was to use the Home Assistant ESPHome integration to drive this project from the next waste collection sensor. I also have local weather information, so that can be used to drive the logic to display in a couple of the quadrants.
Quadrant:
- Weather Condition
- Temperature
- Next Waste Collection
- As yet undefined
For each quadrant, you will see that I have things set up to display one of a particular set of colours. This is based on a very similar approach to setting the text colour of outputs on my information display. However, for the grid, while this will typically be off (LED displaying ‘black’), I actually decided to make this more flexible and allow any colour to be specified. This allowed me to test different colours to see if there was enough difference when displayed via the LEDs to let me distinguish the colour from others I was making available, and it also means I have the code available for amending this or creating future projects where I want more fine level control on setting the colour of the LED from Home Assistant rather than just choosing from presets.
As you might expect, I already had the ESPHome integration installed in Home Assistant, but should you want to set it up yourself, ESPHome have a wonderful getting started guide.
I carried out the base set up on the ATOM Matrix and then set about putting together my ESPHome YAML configuration. Of course this took several iterations and lots of testing and research to get working as I wanted, but a large proportion of this was based on other ESP configuration I had completed - so if you have read through some of my other posts on this already, you may note there is a good chunk of duplication in what I am running through here. Particularly around the more standard aspects.
Substitutions
For ease of reuse, I do endeavour to place substitutions at the top of my ESP32 configurations. The substitution definitions allow me to specify data once and reuse it via a template elsewhere in the configuration.
# Specify substitutions to allow easy name re-use
substitutions:
  device_name: espinfo
  friendly_name: ESPINFO
ESPHome
The ESPHome configuration specifies the name and a project reference for my configuration. The names are of course based on the earlier substitutions.
# Main config begins
esphome:
  name: ${device_name}
  friendly_name: ${friendly_name}
  project:
    name: "sylumer.espinfo"
    version: "1.0.0"
ESP32 Board
This section defines the device being used to Home Assistant’s ESPHome integration.
# ESP32 definition
esp32:
  board: m5stack-atom
  framework:
    type: arduino
Logging
We want logging enabled so we can see feedback in ESPHome’s logging functionality for what is going on. In this instance we don’t have any overly noisy aspects to rule out like I had to for the other display projects I’ve used so far, so just enabling debug-level logging is sufficient.
# Enable logging
logger:
  level: DEBUG
WiFi Connectivity
The substitutions once again come into play as I use my standard set of content for my WiFi connectivity definitions.
# Over the air
ota:
  password: !secret ota_password

# Details of default Wifi and fallback hotspot
wifi:
  ssid: !secret wifi_ssid
  password: !secret wifi_password

  # Enable fallback hotspot (captive portal) in case wifi connection fails
  ap:
    ssid: ${device_name} Fallback Hotspot
    password: !secret ap_password

# No captive portal defined
captive_portal:
Note that I am using secrets to store the more sensitive common information. These are held in my /conf/esphome/secrets.yaml file on my Home Assistant server. This works the same way the secrets.yaml file does for standard Home Assistant configuration does.
To support the above, an example secrets.yaml file might look something like this.
# Your Wi-Fi SSID and password
wifi_ssid: "HomeNetwork"
wifi_password: "67TG^*Vh_0"

# Home Assistant
ota_password: 3fff3ffe000000a11111f00f5e0fffaa"

# Fallback hotspot
ap_password: "E-S_p.32-WIFIpwd"
Home Assistant API
The ATOM Matrix needs to be able to read data from Home Assistant about each of its zones in the same sort of way the information display would read information to display in its sections.
# Enable Home Assistant API
api:
  encryption:
    key: !secret api_encryption_key
Once again I am making use of another secret in the secrets.yaml file for specifying an encryption key to use for communicating with the Home Assistant API.
Sensors
There are quite a few sensors I have defined for the ATOM Matrix, though it actually has quite a few more available to it if you check the device component specifications.
| Sensor | ID | Locale | Purpose |
|---|---|---|---|
| Generic | wifi_value | Device | Signal strength for the currently connected WiFi network |
| Binary | mainbutton | Device | The matrix rests atop a switch which can be used as a trigger |
| Text | info_quad1_colour | Home Assistant | The name of the colour for the first quadrant of the matrix |
| Text | info_quad2_colour | Home Assistant | The name of the colour for the second quadrant of the matrix |
| Text | info_quad3_colour | Home Assistant | The name of the colour for the third quadrant of the matrix |
| Text | info_quad4_colour | Home Assistant | The name of the colour for the fourth quadrant of the matrix |
| Text | info_grid | Home Assistant | The hex colour for the grid zone of the matrix |
| Text | host_ip | Device | The IP address assigned to the device |
These are defined by the following configuration.
# Generic Sensors
sensor:
  - platform: wifi_signal
    id: wifi_value
    name: ${device_name} WiFi Signal
    icon: mdi:icon-strength-2

# Binary Sensors
binary_sensor:
  - platform: gpio
    name: "Main Button"
    id: mainbutton
    pin:
      number: 39
      inverted: true

# Text Sensors
text_sensor:
  # LED Quadrants
  - platform: homeassistant
    id: info_quad1_colour
    entity_id: input_select.info_quad1_colour
  - platform: homeassistant
    id: info_quad2_colour
    entity_id: input_select.info_quad2_colour
  - platform: homeassistant
    id: info_quad3_colour
    entity_id: input_select.info_quad3_colour
  - platform: homeassistant
    id: info_quad4_colour
    entity_id: input_select.info_quad4_colour
  # LED grid
  - platform: homeassistant
    id: info_grid
    entity_id: input_text.info_grid
  # WiFi IP Address
  - platform: wifi_info
    ip_address:
      name: ${device_name} IP Address
      id: host_ip
      entity_category: diagnostic
      icon: mdi:router-wireless
Lights
The RGB LED matrix is really a strip of LED lights that are laid out so as to form a grid. But in terms of how they are defined and addressed at the most basic level, they are a single “bus” of addressable (neopixel) RGB LEDs.
Note that neopixels are very bright and running them at a setting lower than 100% brightness is strongly recommended. For my environment a 30% brightness is sufficient to be visible when the room is lit and not overpowering when the room is dark or dim. This has been done for each colour channel via the colour_correct configuration variable.
# Lights
light:
  # LED Matrix as a strip
  - platform: neopixelbus
    type: GRB
    variant: WS2812x
    pin: 27
    num_leds: 25
    id: led_matrix_light
    color_correct: [30%, 30%, 30%]
    restore_mode: ALWAYS_OFF
Matrix Display
With the light strip for the matrix of LEDs defined, we now need to do some configuration to let ESPHome know that the light strip is a 5 x 5 addressable matrix of LEDS. The configuration to do this is very simple, but yet this section is the longest and most complex. Why? Well this section also includes a ‘lambda’, a C++ construction for an anonymous function. So this is certainly where things have the potential to step up a gear in technical terms. However, I’ve added lots of comments and I don’t think the lambda is too hard to follow, but I have added some additional sections below the code to explain what the lambda does.
# Displays
display:
  # LED Matrix as an addressable grid
  - platform: addressable_light
    id: led_matrix_display
    addressable_light_id: led_matrix_light
    width: 5
    height: 5
    rotation: 0
    update_interval: 16ms
    lambda: |-
      // Define available colours
      Color Red = Color(0xFF0000);
      Color Green = Color(0x00FF00);
      Color Blue = Color(0x0000FF);
      Color White = Color(0xFFFFFF);
      Color Black = Color(0x000000);
      Color Orange = Color(0xFFA500);
      Color Yellow = Color(0xFFFF00);
      Color Magenta = Color(0xFF00FF);
      Color Cyan = Color(0x00FFFF);
      Color Silver = Color(0xC0C0C0);

      // Get the hexadecimal colour string from info_grid
      std::string gridColorStr = id(info_grid).state.c_str();

      // Convert the hexadecimal string to a 'Color' object
      uint32_t gridColorValue;
      sscanf(gridColorStr.c_str(), "%x", &gridColorValue);

      // Define the colour 'Grid'
      Color Grid = Color(gridColorValue);

      // Set colour for quad 1
      if(id(info_quad1_colour).state == "Red") {it.rectangle(0, 0, 2, 2, Red);}
      if(id(info_quad1_colour).state == "Green") {it.rectangle(0, 0, 2, 2, Green);}
      if(id(info_quad1_colour).state == "Blue") {it.rectangle(0, 0, 2, 2, Blue);}
      if(id(info_quad1_colour).state == "White") {it.rectangle(0, 0, 2, 2, White);}
      if(id(info_quad1_colour).state == "Black") {it.rectangle(0, 0, 2, 2, Black);}
      if(id(info_quad1_colour).state == "Orange") {it.rectangle(0, 0, 2, 2, Orange);}
      if(id(info_quad1_colour).state == "Yellow") {it.rectangle(0, 0, 2, 2, Yellow);}
      if(id(info_quad1_colour).state == "Purple") {it.rectangle(0, 0, 2, 2, Magenta);}
      if(id(info_quad1_colour).state == "Cyan") {it.rectangle(0, 0, 2, 2, Cyan);}
      if(id(info_quad1_colour).state == "Grey") {it.rectangle(0, 0, 2, 2, Silver);}

      // Set colour for quad 2
      if(id(info_quad2_colour).state == "Red") {it.rectangle(3, 0, 2, 2, Red);}
      if(id(info_quad2_colour).state == "Green") {it.rectangle(3, 0, 2, 2, Green);}
      if(id(info_quad2_colour).state == "Blue") {it.rectangle(3, 0, 2, 2, Blue);}
      if(id(info_quad2_colour).state == "White") {it.rectangle(3, 0, 2, 2, White);}
      if(id(info_quad2_colour).state == "Black") {it.rectangle(3, 0, 2, 2, Black);}
      if(id(info_quad2_colour).state == "Orange") {it.rectangle(3, 0, 2, 2, Orange);}
      if(id(info_quad2_colour).state == "Yellow") {it.rectangle(3, 0, 2, 2, Yellow);}
      if(id(info_quad2_colour).state == "Purple") {it.rectangle(3, 0, 2, 2, Magenta);}
      if(id(info_quad2_colour).state == "Cyan") {it.rectangle(3, 0, 2, 2, Cyan);}
      if(id(info_quad2_colour).state == "Grey") {it.rectangle(3, 0, 2, 2, Silver);}

      // Set colour for quad 3
      if(id(info_quad3_colour).state == "Red") {it.rectangle(0, 3, 2, 2, Red);}
      if(id(info_quad3_colour).state == "Green") {it.rectangle(0, 3, 2, 2, Green);}
      if(id(info_quad3_colour).state == "Blue") {it.rectangle(0, 3, 2, 2, Blue);}
      if(id(info_quad3_colour).state == "White") {it.rectangle(0, 3, 2, 2, White);}
      if(id(info_quad3_colour).state == "Black") {it.rectangle(0, 3, 2, 2, Black);}
      if(id(info_quad3_colour).state == "Orange") {it.rectangle(0, 3, 2, 2, Orange);}
      if(id(info_quad3_colour).state == "Yellow") {it.rectangle(0, 3, 2, 2, Yellow);}
      if(id(info_quad3_colour).state == "Purple") {it.rectangle(0, 3, 2, 2, Magenta);}
      if(id(info_quad3_colour).state == "Cyan") {it.rectangle(0, 3, 2, 2, Cyan);}
      if(id(info_quad3_colour).state == "Grey") {it.rectangle(0, 3, 2, 2, Silver);}

      // Set colour for quad 4
      if(id(info_quad4_colour).state == "Red") {it.rectangle(3, 3, 2, 2, Red);}
      if(id(info_quad4_colour).state == "Green") {it.rectangle(3, 3, 2, 2, Green);}
      if(id(info_quad4_colour).state == "Blue") {it.rectangle(3, 3, 2, 2, Blue);}
      if(id(info_quad4_colour).state == "White") {it.rectangle(3, 3, 2, 2, White);}
      if(id(info_quad4_colour).state == "Black") {it.rectangle(3, 3, 2, 2, Black);}
      if(id(info_quad4_colour).state == "Orange") {it.rectangle(3, 3, 2, 2, Orange);}
      if(id(info_quad4_colour).state == "Yellow") {it.rectangle(3, 3, 2, 2, Yellow);}
      if(id(info_quad4_colour).state == "Purple") {it.rectangle(3, 3, 2, 2, Magenta);}
      if(id(info_quad4_colour).state == "Cyan") {it.rectangle(3, 3, 2, 2, Cyan);}
      if(id(info_quad4_colour).state == "Grey") {it.rectangle(3, 3, 2, 2, Silver);}

      // Draw grid
      it.line(0, 2, 4, 2, Grid);
      it.line(2, 0, 2, 4, Grid);
The first section of the lambda defines ten standard colours in a hexadecimal format. The 0x defines that it is a hexadecimal representation, and the following characters are two character hex-codes for the red, green, and blue respectively. Note that black is defined as 0x000000, and using this colour effectively turns the red, green and blue components of a neopixel LED off.
// Define available colours
Color Red = Color(0xFF0000);
Color Green = Color(0x00FF00);
Color Blue = Color(0x0000FF);
Color White = Color(0xFFFFFF);
Color Black = Color(0x000000);
Color Orange = Color(0xFFA500);
Color Yellow = Color(0xFFFF00);
Color Magenta = Color(0xFF00FF);
Color Cyan = Color(0x00FFFF);
Color Silver = Color(0xC0C0C0);
These are the colours that will be used in the quadrants, but you may recall that I mentioned giving myself a more granular level of control over the grid zone. The first line of code here gets the state of the info_grid sensor, which you may recall from the sensor configuration is linked to the input_text.info_grid entity in Home Assistant (we’ll cover defining that later in this post). The second line of code defines gridColorValue as an unsigned 32-bit integer. The third line of code then takes the state string that was retrieved from Home Assistant, and converts that into a hexadecimal value, which is then stored in gridColorValue. The final line of code then defines that as a colour called Grid.
// Get the hexadecimal colour string from info_grid
std::string gridColorStr = id(info_grid).state.c_str();

// Convert the hexadecimal string to a 'Color' object
uint32_t gridColorValue;
sscanf(gridColorStr.c_str(), "%x", &gridColorValue);

// Define the colour 'Grid'
Color Grid = Color(gridColorValue);
The next four blocks of lambda code are almost identical, and are repeated for each of the quadrants (1-4). Each simply works through a list of colour names that could be retrieved from Home Assistant as the colour of the quadrant, and then fills the quadrant by lighting a 2 x 2 LED rectangle based on a coordinate for the top left corner LED of the quadrant.
// Set colour for quad 1
if(id(info_quad1_colour).state == "Red") {it.rectangle(0, 0, 2, 2, Red);}
if(id(info_quad1_colour).state == "Green") {it.rectangle(0, 0, 2, 2, Green);}
if(id(info_quad1_colour).state == "Blue") {it.rectangle(0, 0, 2, 2, Blue);}
if(id(info_quad1_colour).state == "White") {it.rectangle(0, 0, 2, 2, White);}
if(id(info_quad1_colour).state == "Black") {it.rectangle(0, 0, 2, 2, Black);}
if(id(info_quad1_colour).state == "Orange") {it.rectangle(0, 0, 2, 2, Orange);}
if(id(info_quad1_colour).state == "Yellow") {it.rectangle(0, 0, 2, 2, Yellow);}
if(id(info_quad1_colour).state == "Purple") {it.rectangle(0, 0, 2, 2, Magenta);}
if(id(info_quad1_colour).state == "Cyan") {it.rectangle(0, 0, 2, 2, Cyan);}
if(id(info_quad1_colour).state == "Grey") {it.rectangle(0, 0, 2, 2, Silver);}
Note that most but not all colours defined in home Assistant match the colour being applied to the matrix. I used recognisable colour names in Home Assistant, but directly applying the RGB associated with those names did not look great, so where necessary I deviated a little, but still maintained the correct name in the YAML configuration. It is effectively a mapping of object colour to a useful light colour.
| Quadrant | Top Left LED Coordinates |
|---|---|
| 1 | 0,0 |
| 2 | 3,0 |
| 3 | 0,3 |
| 4 | 3,3 |

The final couple of lines of code draw two lines. One from 0,2 to 4,2, and one from 2,0 to 4,2. These two lines are lit in the Grid colour and will bisect the matrix on each axis to separate the quadrants.
// Draw grid
it.line(0, 2, 4, 2, Grid);
it.line(2, 0, 2, 4, Grid);
Full Configuration File
Below is what the amalgamated configuration file looks like. If you skipped down to this section and did not bother reading the above sections, I would recommend that you go back and check out the details as there will probably be some aspects of the configuration you would want to tailor to your own requirements.
# Specify substitutions to allow easy name re-use
substitutions:
  device_name: espinfo
  friendly_name: ESPINFO

# Main config begins
esphome:
  name: ${device_name}
  friendly_name: ${friendly_name}
  project:
    name: "sylumer.espinfo"
    version: "1.0.0"

# ESP32 definition
esp32:
  board: m5stack-atom
  framework:
    type: arduino

# Enable logging
logger:
  level: DEBUG

# Over the air
ota:
  password: !secret ota_password

# Details of default Wifi and fallback hotspot
wifi:
  ssid: !secret wifi_ssid
  password: !secret wifi_password

  # Enable fallback hotspot (captive portal) in case wifi connection fails
  ap:
    ssid: ${device_name} Fallback Hotspot
    password: !secret ap_password

# Portal
captive_portal:

# Enable Home Assistant API
api:
  encryption:
    key: !secret api_encryption_key

# Generic Sensors
sensor:
  - platform: wifi_signal
    id: wifi_value
    name: ${device_name} WiFi Signal
    icon: mdi:icon-strength-2

# Binary Sensors
binary_sensor:
  - platform: gpio
    name: "Main Button"
    id: mainbutton
    pin:
      number: 39
      inverted: true

# Text Sensors
text_sensor:
  # LED Quadrants
  - platform: homeassistant
    id: info_quad1_colour
    entity_id: input_select.info_quad1_colour
  - platform: homeassistant
    id: info_quad2_colour
    entity_id: input_select.info_quad2_colour
  - platform: homeassistant
    id: info_quad3_colour
    entity_id: input_select.info_quad3_colour
  - platform: homeassistant
    id: info_quad4_colour
    entity_id: input_select.info_quad4_colour
  # LED grid
  - platform: homeassistant
    id: info_grid
    entity_id: input_text.info_grid
  # WiFi IP Address
  - platform: wifi_info
    ip_address:
      name: ${device_name} IP Address
      id: host_ip
      entity_category: diagnostic
      icon: mdi:router-wireless

# Lights
light:
  # LED Matrix as a strip
  - platform: neopixelbus
    type: GRB
    variant: WS2812x
    pin: 27
    num_leds: 25
    id: led_matrix_light
    color_correct: [30%, 30%, 30%]
    restore_mode: ALWAYS_OFF

# Displays
display:
  # LED Matrix as an addressable grid
  - platform: addressable_light
    id: led_matrix_display
    addressable_light_id: led_matrix_light
    width: 5
    height: 5
    rotation: 0
    update_interval: 16ms
    lambda: |-
      // Define available colours
      Color Red = Color(0xFF0000);
      Color Green = Color(0x00FF00);
      Color Blue = Color(0x0000FF);
      Color White = Color(0xFFFFFF);
      Color Black = Color(0x000000);
      Color Orange = Color(0xFFA500);
      Color Yellow = Color(0xFFFF00);
      Color Magenta = Color(0xFF00FF);
      Color Cyan = Color(0x00FFFF);
      Color Silver = Color(0xC0C0C0);

      // Get the hexadecimal colour string from info_grid
      std::string gridColorStr = id(info_grid).state.c_str();

      // Convert the hexadecimal string to a 'Color' object
      uint32_t gridColorValue;
      sscanf(gridColorStr.c_str(), "%x", &gridColorValue);

      // Define the colour 'Grid'
      Color Grid = Color(gridColorValue);

      // Set colour for quad 1
      if(id(info_quad1_colour).state == "Red") {it.rectangle(0, 0, 2, 2, Red);}
      if(id(info_quad1_colour).state == "Green") {it.rectangle(0, 0, 2, 2, Green);}
      if(id(info_quad1_colour).state == "Blue") {it.rectangle(0, 0, 2, 2, Blue);}
      if(id(info_quad1_colour).state == "White") {it.rectangle(0, 0, 2, 2, White);}
      if(id(info_quad1_colour).state == "Black") {it.rectangle(0, 0, 2, 2, Black);}
      if(id(info_quad1_colour).state == "Orange") {it.rectangle(0, 0, 2, 2, Orange);}
      if(id(info_quad1_colour).state == "Yellow") {it.rectangle(0, 0, 2, 2, Yellow);}
      if(id(info_quad1_colour).state == "Purple") {it.rectangle(0, 0, 2, 2, Magenta);}
      if(id(info_quad1_colour).state == "Cyan") {it.rectangle(0, 0, 2, 2, Cyan);}
      if(id(info_quad1_colour).state == "Grey") {it.rectangle(0, 0, 2, 2, Silver);}

      // Set colour for quad 2
      if(id(info_quad2_colour).state == "Red") {it.rectangle(3, 0, 2, 2, Red);}
      if(id(info_quad2_colour).state == "Green") {it.rectangle(3, 0, 2, 2, Green);}
      if(id(info_quad2_colour).state == "Blue") {it.rectangle(3, 0, 2, 2, Blue);}
      if(id(info_quad2_colour).state == "White") {it.rectangle(3, 0, 2, 2, White);}
      if(id(info_quad2_colour).state == "Black") {it.rectangle(3, 0, 2, 2, Black);}
      if(id(info_quad2_colour).state == "Orange") {it.rectangle(3, 0, 2, 2, Orange);}
      if(id(info_quad2_colour).state == "Yellow") {it.rectangle(3, 0, 2, 2, Yellow);}
      if(id(info_quad2_colour).state == "Purple") {it.rectangle(3, 0, 2, 2, Magenta);}
      if(id(info_quad2_colour).state == "Cyan") {it.rectangle(3, 0, 2, 2, Cyan);}
      if(id(info_quad2_colour).state == "Grey") {it.rectangle(3, 0, 2, 2, Silver);}

      // Set colour for quad 3
      if(id(info_quad3_colour).state == "Red") {it.rectangle(0, 3, 2, 2, Red);}
      if(id(info_quad3_colour).state == "Green") {it.rectangle(0, 3, 2, 2, Green);}
      if(id(info_quad3_colour).state == "Blue") {it.rectangle(0, 3, 2, 2, Blue);}
      if(id(info_quad3_colour).state == "White") {it.rectangle(0, 3, 2, 2, White);}
      if(id(info_quad3_colour).state == "Black") {it.rectangle(0, 3, 2, 2, Black);}
      if(id(info_quad3_colour).state == "Orange") {it.rectangle(0, 3, 2, 2, Orange);}
      if(id(info_quad3_colour).state == "Yellow") {it.rectangle(0, 3, 2, 2, Yellow);}
      if(id(info_quad3_colour).state == "Purple") {it.rectangle(0, 3, 2, 2, Magenta);}
      if(id(info_quad3_colour).state == "Cyan") {it.rectangle(0, 3, 2, 2, Cyan);}
      if(id(info_quad3_colour).state == "Grey") {it.rectangle(0, 3, 2, 2, Silver);}

      // Set colour for quad 4
      if(id(info_quad4_colour).state == "Red") {it.rectangle(3, 3, 2, 2, Red);}
      if(id(info_quad4_colour).state == "Green") {it.rectangle(3, 3, 2, 2, Green);}
      if(id(info_quad4_colour).state == "Blue") {it.rectangle(3, 3, 2, 2, Blue);}
      if(id(info_quad4_colour).state == "White") {it.rectangle(3, 3, 2, 2, White);}
      if(id(info_quad4_colour).state == "Black") {it.rectangle(3, 3, 2, 2, Black);}
      if(id(info_quad4_colour).state == "Orange") {it.rectangle(3, 3, 2, 2, Orange);}
      if(id(info_quad4_colour).state == "Yellow") {it.rectangle(3, 3, 2, 2, Yellow);}
      if(id(info_quad4_colour).state == "Purple") {it.rectangle(3, 3, 2, 2, Magenta);}
      if(id(info_quad4_colour).state == "Cyan") {it.rectangle(3, 3, 2, 2, Cyan);}
      if(id(info_quad4_colour).state == "Grey") {it.rectangle(3, 3, 2, 2, Silver);}

      // Draw grid
      it.line(0, 2, 4, 2, Grid);
      it.line(2, 0, 2, 4, Grid);
Now we have a configuration for our ESP32 device to display content, we need to do some configuration in Home Assistant to make content available. Once the device is registered as configured in Home Assistant, its settings look something like this.

Key things to note right now are the button and the diagnostic WiFi information. You might also note I have an automation configured, and I will cover that before the end of the post.
Home Assistant Helper Configuration
The ATOM Matrix configuration is covered, but it is no use without the data in Home Assistant to drive it. Just like for my information display I have elected to use helper entities in Home Assistant. It makes things really easy for testing, and using a consistent approach I am sure will make things easier for myself in regard to long term maintenance.
The helpers are configured within Settings > Devices and Services > Helpers in Home Assistant, and I use two different types for this project.
Static Colour Dropdown
The names of the ten colours programmed into the display lambda are set up as “dropdown” helpers for each of the quadrants.

An identical helper was created for each of the four quadrants. Unfortunately, Home Assistant currently has no convenient duplication option, so each of them was created manually.
Dynamic Colour String
The colour for the grid you may recall is to be specified as a hexadecimal colour string. Only one such helper is required and this was defined as a text helper. The key element to note is the regular expression pattern that is defined. ^0x[0-9A-Fa-f]{6}$ is used to ensure the field begins 0x, and is followed by exactly six hexadecimal characters.

Adding the Helpers to the User Interface
For testing purposes I find it useful to have these helper entities accessible for modification on a dashboard page. The following dashboard widget was configured using the YAML below.

type: entities
entities:
  - entity: input_select.info_quad1_colour
    name: Q1 Weather
  - entity: input_select.info_quad2_colour
    name: Q2 Temperature
  - entity: input_select.info_quad3_colour
    name: Q3 Waste Collection
  - entity: input_select.info_quad4_colour
    name: Q4 TBC
  - entity: input_text.info_grid
title: Info
Home Assistant Automation
At this point all of the configuration is in place to allow the ATOM Matrix display to have its zone colours set via this widget. However, the whole point of this was to automate the setting of the colouration of the zones, so there is more work to do to hook up some automatic data feeds.
Quadrant 1 - Weather
The first quadrant is to display a set a colour based on the primary weather condition. To set this I created an automation that runs every hour. It uses data from a local Weather Underground station that I’ve surfaced in Home Assistant using the wundergroundpws custom integration. It uses value templates to identify if keywords are present in the current weather status. When present, it sets a colour in the input_select.info_quad1_colour by using Call Service to specify the value for the input select.
| Check State For | Colour Selection |
|---|---|
| “sun” | Orange |
| “snow” | White |
| “cloud” | Grey |
| “rain” | Cyan |
| “storm” | Blue |
| “wind” | Purple |
The default colour is set to ‘Red’ each time the automation runs and then is modified by the matched type of weather. This way if a weather condition occurs that I have not accounted for, it will show as Red and I can check on what it is and update the automation to account for it.
The YAML for this automation is shown below.
alias: Time Hourly - Info - Weather
description: Set Quad 1 colour based on type of weather from Weather Underground station.
trigger:
  - platform: time_pattern
    minutes: "01"
    seconds: "10"
condition: []
action:
  - service: input_select.select_option
    target:
      entity_id: input_select.info_quad1_colour
    data:
      option: Red
    alias: Default to Red to flag if we get an unaccounted for condition
  - alias: Sun => Orange
    if:
      - condition: template
        value_template: "{{ 'sun' in states('weather.iyork000') }}"
    then:
      - service: input_select.select_option
        metadata: {}
        data:
          option: Orange
        target:
          entity_id: input_select.info_quad1_colour
  - alias: Snow => White
    if:
      - condition: template
        value_template: "{{ 'snow' in states('weather.iyork000') }}"
    then:
      - service: input_select.select_option
        metadata: {}
        data:
          option: White
        target:
          entity_id: input_select.info_quad1_colour
  - alias: Cloud => Grey
    if:
      - condition: template
        value_template: "{{ 'cloud' in states('weather.iyork000') }}"
    then:
      - service: input_select.select_option
        metadata: {}
        data:
          option: Grey
        target:
          entity_id: input_select.info_quad1_colour
  - if:
      - condition: template
        value_template: "{{ 'rain' in states('weather.iyork000') }}"
    then:
      - service: input_select.select_option
        metadata: {}
        data:
          option: Cyan
        target:
          entity_id: input_select.info_quad1_colour
    alias: Rain => Cyan
  - if:
      - condition: template
        value_template: "{{ 'storm' in states('weather.iyork000') }}"
    then:
      - service: input_select.select_option
        metadata: {}
        data:
          option: Blue
        target:
          entity_id: input_select.info_quad1_colour
    alias: Storm => Blue
  - if:
      - condition: template
        value_template: "{{ 'wind' in states('weather.iyork000') }}"
    then:
      - service: input_select.select_option
        metadata: {}
        data:
          option: Purple
        target:
          entity_id: input_select.info_quad1_colour
    alias: Wind => Purple
mode: single
Quadrant 2 - Temperature
The temperature once again uses a local weather station available via Weather Underground. This time a range check is carried out on the temperature (in Celsius and integer values), and a colour is displayed in line with the temperature. Again an hourly check is carried out via an automation, and the mapping is based on the following.
| Range | Lower Bound | Upper Bound | Colour |
|---|---|---|---|
| 0 and below | - | 1 | White |
| 1 to 10 | 0 | 11 | Cyan |
| 11 to 15 | 10 | 16 | Green |
| 16 to 20 | 15 | 21 | Yellow |
| 21 to 25 | 20 | 26 | Orange |
| 26 and above | 25 | - | Red |
The YAML for this automation is shown below.
alias: Time Hourly - Info - Temperature
description: >-
  Set Quad 2 colour based on current temperature from Weather Underground
  station.
trigger:
  - platform: time_pattern
    minutes: "01"
condition: []
action:
  - if:
      - condition: numeric_state
        entity_id: weather.iyork000
        attribute: temperature
        below: 1
    then:
      - service: input_select.select_option
        metadata: {}
        data:
          option: White
        target:
          entity_id: input_select.info_quad2_colour
    alias: 0 or below, set quad 2 white
  - alias: Between 0 and 10, set quad 2 cyan
    if:
      - condition: numeric_state
        entity_id: weather.iyork000
        attribute: temperature
        below: 11
        above: 0
    then:
      - service: input_select.select_option
        metadata: {}
        data:
          option: Cyan
        target:
          entity_id: input_select.info_quad2_colour
  - alias: Between 10 and 15, set quad 2 green
    if:
      - condition: numeric_state
        entity_id: weather.iyork000
        attribute: temperature
        below: 16
        above: 10
    then:
      - service: input_select.select_option
        metadata: {}
        data:
          option: Green
        target:
          entity_id: input_select.info_quad2_colour
  - alias: Between 16 and 20, set quad 2 yellow
    if:
      - condition: numeric_state
        entity_id: weather.iyork000
        attribute: temperature
        below: 21
        above: 15
    then:
      - service: input_select.select_option
        metadata: {}
        data:
          option: Yellow
        target:
          entity_id: input_select.info_quad2_colour
  - alias: Between 21 and 25, set quad 2 orange
    if:
      - condition: numeric_state
        entity_id: weather.iyork000
        attribute: temperature
        below: 26
        above: 20
    then:
      - service: input_select.select_option
        metadata: {}
        data:
          option: Orange
        target:
          entity_id: input_select.info_quad2_colour
  - alias: Over 25, set quad 2 red
    if:
      - condition: numeric_state
        entity_id: weather.iyork000
        attribute: temperature
        above: 25
    then:
      - service: input_select.select_option
        metadata: {}
        data:
          option: Red
        target:
          entity_id: input_select.info_quad2_colour
mode: single
Quadrant 3 - Waste Collection
As noted right at the start I use the Waste Collection Schedule integration to get the details for my local waste collection, and specifically the details for the next collection. The collection types are mapped as follows to colours as follows.
| Collection Type | Contains | Colour |
|---|---|---|
| Refuse | Refuse | White |
| Recycling and Garden | Garden | Green |
| Recycling | Orange |
Note that recycling is not a unique term, but because there is always a next collection, I can default anything that does not contain “Refuse” or “Garden” to be recycling only.
The YAML for this automation, that is run daily, is shown below.
alias: Time 00:20:00 - Info - Waste Collection
description: Q3 info for waste collection
trigger:
  - platform: time
    at: "00:20:00"
condition: []
action:
  - alias: Bins or Greens?
    if:
      - alias: Next collection is bins
        condition: template
        value_template: "{{ 'Refuse' in states('sensor.next_waste_collection') }}"
    then:
      - service: input_select.select_option
        metadata: {}
        data:
          option: White
        target:
          entity_id: input_select.info_quad3_colour
        alias: Refuse -> Set quad 3 white
    else:
      - alias: Next collection is greens
        if:
          - alias: Next collection includes garden waste
            condition: template
            value_template: "{{ 'Garden' in states('sensor.next_waste_collection') }}"
        then:
          - alias: Garden and Recycling -> Set quad 3 green
            service: input_select.select_option
            metadata: {}
            data:
              option: Green
            target:
              entity_id: input_select.info_quad3_colour
        else:
          - alias: Recycling only -> Set quad 3 orange
            service: input_select.select_option
            metadata: {}
            data:
              option: Orange
            target:
              entity_id: input_select.info_quad3_colour
mode: single
Bonus: Clarification Announcement
When I configured the ATOM Matrix I set up the switch beneath the LED matrix as a button. I have assigned this button to a final automation that is intended to help my family and I recall what the less frequently displayed colours might mean. After all, after a period of UK winter weather we might not recall that orange in quadrant 1 corresponds to a sunny day.
When triggered, this automation uses a set of value templates to take the raw data used in each of the three previous automations and deliver a spoken summary via the Amazon Alexa located close by in the kitchen.
alias: Speak Info in Kitchen
description: ""
trigger:
  - type: turned_on
    platform: device
    device_id: 3baaaa012d0000000000b03aaaa3abba
    entity_id: 04aaaaad0000000000054f5aaaaabaaf
    domain: binary_sensor
condition: []
action:
  - service: notify.alexa_media_kitchen
    data:
      message: >-
        Weather is {{ states('weather.iyork000') }}. Temperature is {{
        states('sensor.iyork000_temperature') }} degrees. Next collection is {{
        states('sensor.next_waste_collection') }}.
mode: single
Conclusion
The ATOM Matrix is now installed in my kitchen in a small unused space between some kitchen cupboards and the kitchen door. At some point I will replace and restrain the current USB C cable with something a little more subtle. Certainly a more neutral coloured cable, and probably one with a right angle connection so I can then run it neat against the cupboard edge for most of its length.

That is my latest little side-project with Home Assistant, and while I wasn’t sure what the family would think, everyone independently noted that it was really useful. I couldn’t really have asked for higher praise, and it is particularly surprising given how it looks with the long red tail of a red USB cable hanging out the bottom.
I hope that you have found this post useful and even if you do not plan to implement something exactly the same as this that it has given you some ideas and inspiration for how you could use an ESP32 powered LED matrix with your own instance of Home Assistant. Do let me know over on Mastodon if you have found this helpful and what you are planning to do or have done along similar lines.