Keyboard Maestro Plugins for the Elgato Stream Deck
11 Jan 2020Last year, Keyboard Maestro 9 launched with official support for a piece of hardware known as the Elgato Stream Deck. Providing a set of dynamic buttons, the Stream Deck in conjunction with Keyboard Maestro fundamentally allows you to trigger macros from the Stream Deck’s buttons. This makes for a versatile and engaging set-up for anyone wishing to streamline their workflows and make them easily triggered. The integration through works through the use of a Stream Deck plug-in, but did you know you can use more than one Keyboard Maestro plug-in for the Stream Deck?
The Official Keyboard Maestro Plug-in
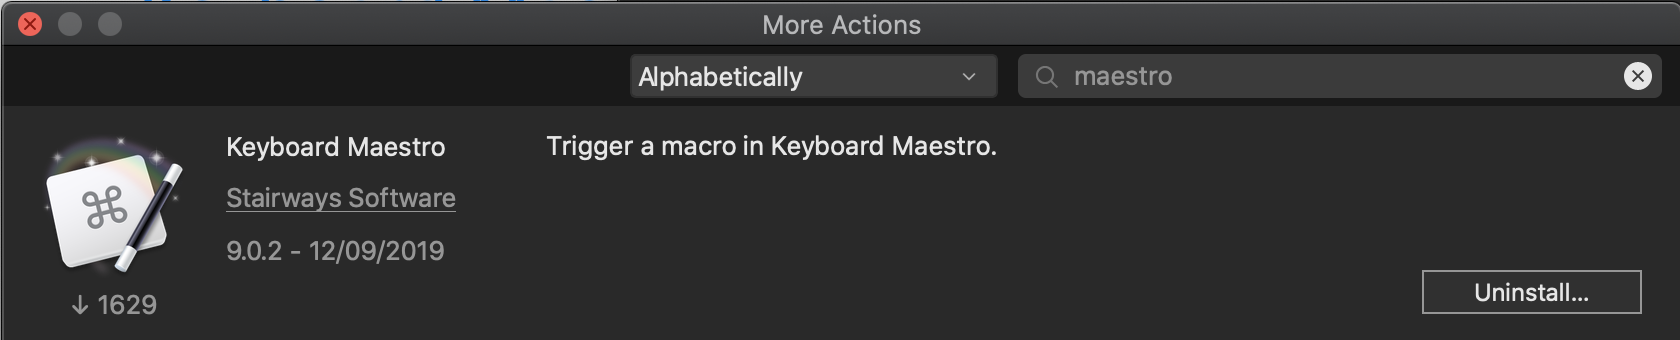
The official Keyboard Maestro plugin is available via the Stream Deck app in the More Actions section, and enables a limited amount of two-way communication between the Stream Deck and Keyboard Maestro.
Once you have installed the plug-in, you will have a new section in the Stream Deck app in the actions list. It’s called Automation, and beneath that is an action called Keyboard Maestro. To use the action, it is simply a case of dragging the action over to one of the buttons on the left of the actions list. You can even inclde it as a step in a multi-step action.
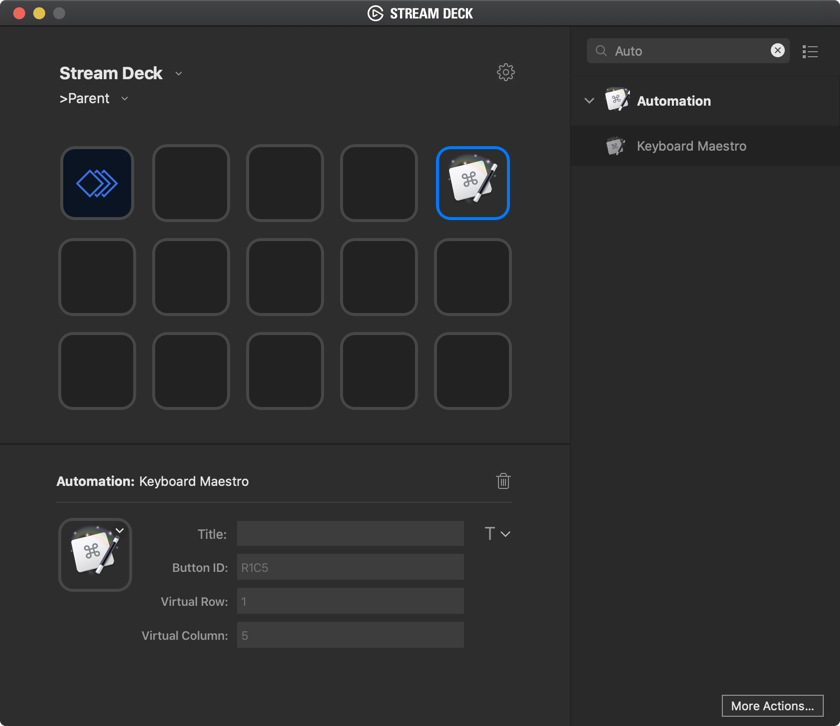
Adding directly to a button, the button then has five attributes.
- Icon - the icon defaults to the Keyboard Maestro icon, but you can change this to any icon you like.
- Title - the text you want to display on the button. You can leve this blank if the icon is enough of an indicator for the purpose of the button.
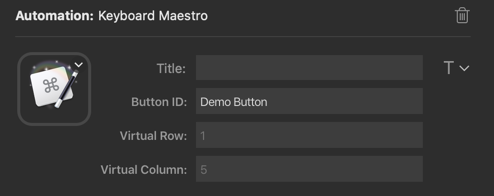
- Button ID - the button ID defaults to a standard row and column index position (“R1C5” above), but this can be changed to something you find more descriptive (“e.g. Demo Button” below). Naming it after the Keyboard Maestro button can be useful, but you have to do this manually.
- Virtual Row - this is used by the Keyboard Maestro plugin to uniquely identify the button. If you are using the button in multiple folders and profiles across apps, you may find it is necessary to change the ID to avoid clashes.
- Virtual Column - this is used by the Keyboard Maestro plugin to uniquely identify the button. If you are using the button in multiple folders and profiles across apps, you may find it is necessary to change the ID to avoid clashes.
Once the button set-up has been completed on the Stream Deck side, you then switch to Keyboard Maestro. Select a trigger as “This Device key:”, click into the selection field, and then press the button on the Stream Deck (physical hardware button on the device, or the soft buttonn in the Stream Deck mobile app; you can’t do this from the Stream Deck Mac app).
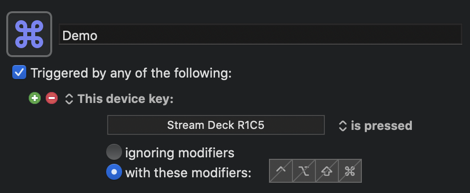
Note that as usual, you can overload and narrow the behaviours by setting the modifier keys and the key press behaviour.
Once you’ve completed this, then you have a Keyboard Maestro macro trigger on your Stream Deck.
The Not so Official Keyboard Maestro Plug-in
As well as the official plug-in, there is also another plug-in available from a developer and Keyboard Maestro user called Corcules. This plugin is not listed in the Stream Deck actions directory, but then neither was the Keyboard Maestro plug-in originally. That being said, while I do use this plug-in, you should obviously make your own decision as to whether you are happy adding this plug-in to your system or not.
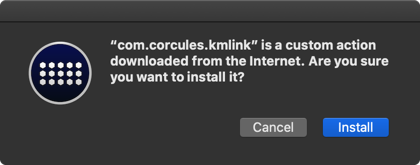
To install the plugin visit Corucles’ GitHub repository for the KMLink plug-in, and download the com.corcules.kmlink.streamDeckPlugin file. Open the file to prompt for install, and install it.
Once installed, you will see the KMLink in your list of installed actions.

This time, the action will appear in the Custom actions section, but once again you can add it directly to a button or as part of a multi-step action.
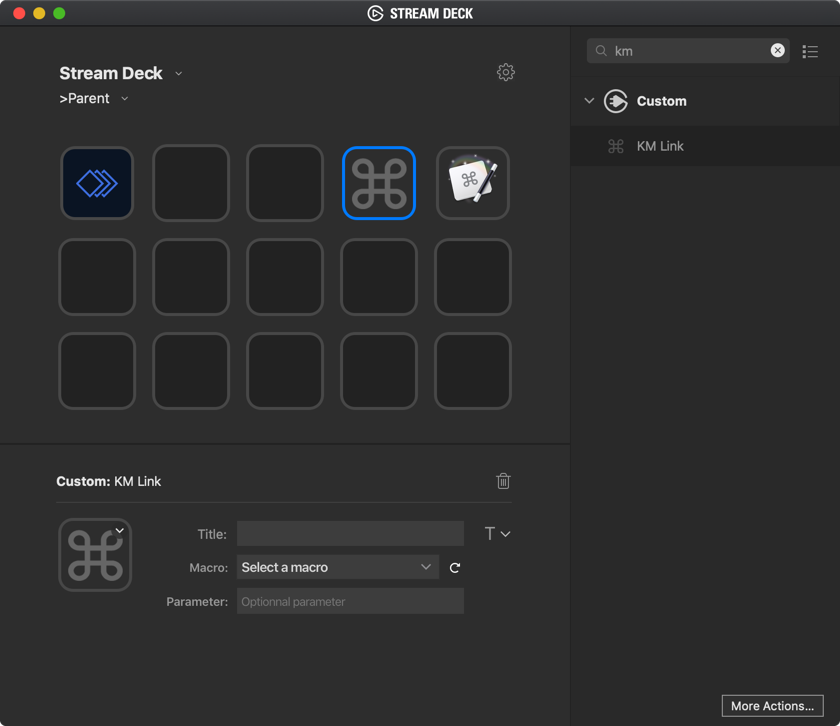
Adding directly to a button, the button then has five attributes.
- Icon - the icon defaults to the Keyboard Maestro icon, but you can change this to any icon you like.
- Title - the text you want to display on the button. You can leve this blank if the icon is enough of an indicator for the purpose of the button.
- Macro - this is a drop down list that lets you chose directly which Keyboard Maestro macro to be run.
- Parameter - Keyboard Maestro macros can accept parameters, and this allows you to pass a static parameter into the macro.
And that’s it. There’s no dealing with virtual button indicies or even setting triggers on the Keyboard Maestro side.
Which Plug-in is Best?
There’s an easy answer to this. Because the plug-ins can coexist quite happily, there is nothing stopping you from having both installed and using both. Best of all worlds.
Certainly the KMLink plugin is quicker and easier to use, so if you just need to trigger a macro, I would recommend using this one. It also has the benefit of allowing you to pass in a parameter. I suspect that it is probably calling the macro using a URL, which has inbuilt provision for parameters.
The official Keyboard Maestro plugin on the other hand is more complex to utilise, but it does have a few key elements if you are looking to utilise a greater level of complexity, and I have a future post planned on one of these. But it is worth noting that by using the offcial plug-in you can have your button carry out different macros based on modifier keys and how many times it is pressed. This can be excpetionally useful on a smaller Stream Deck. Also the option to dynamically set the icon and text from a macro could be useful for some.
Other Alternatives
As well as the official plug-ins, there are a couple of other ways you might utilise a Stream Deck to launch a macro.
Firstly you could use the standard hot key functionality to trigger a macro with a standard key press. It makes sense in these scenarios to utilise keys not readily available on a typical Mac keyboard, such as a high number function key. These can be accessed from the drop down triangle to the left of the HotKey field in the Stream Deck app.
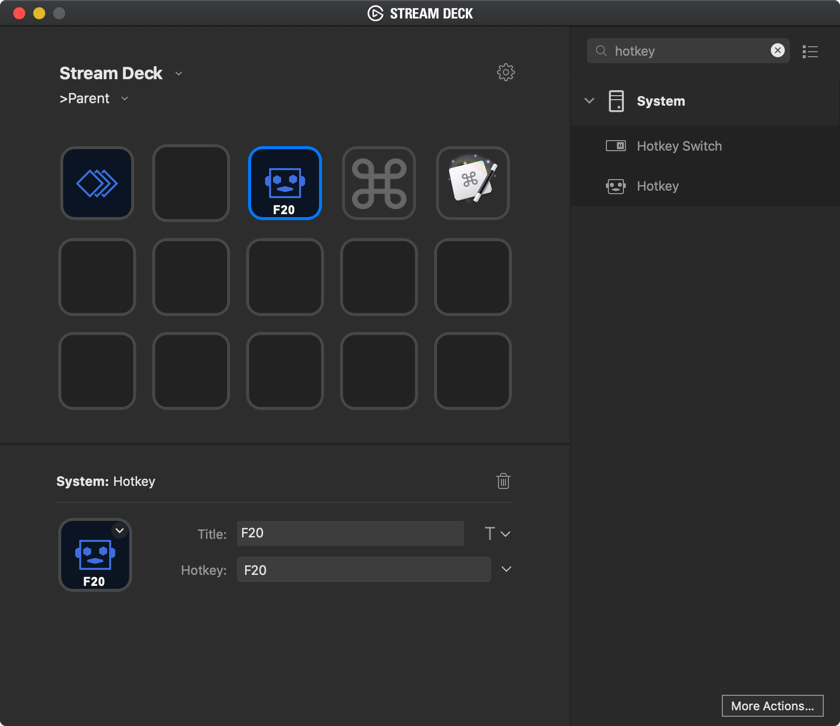
Then just associate the Keyboard Maestro macro with the key as usual. The only thing to watch out for, as usual, is if you have any pro-level apps that have pre-set high number function key shortcuts.
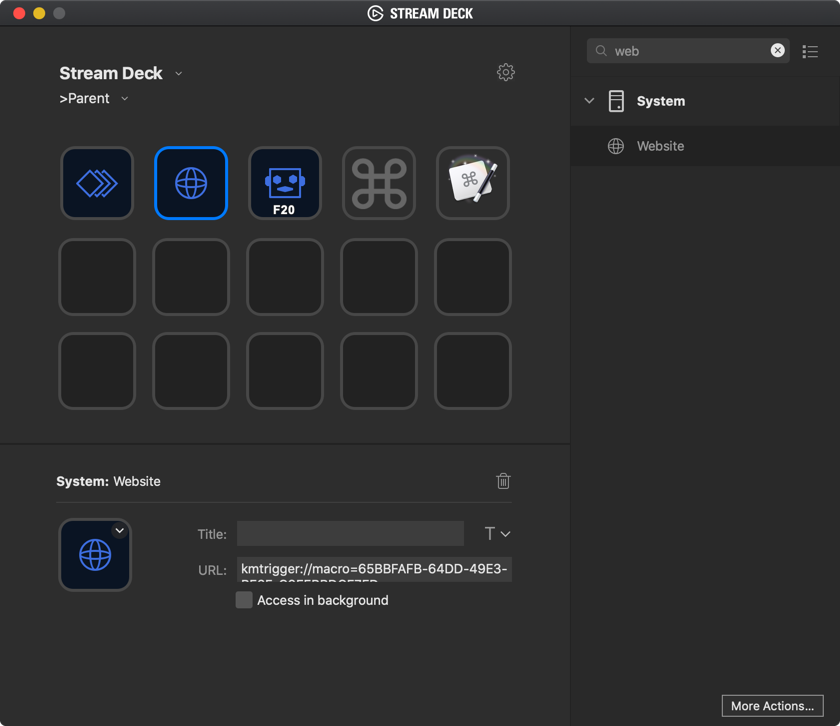
Secondly, you can trigger a macro from its URL. As I noted above, I suspect this is how the KMLink plugin works, and you can do the same yourself.
Start by copying the trigger URL from the macro.
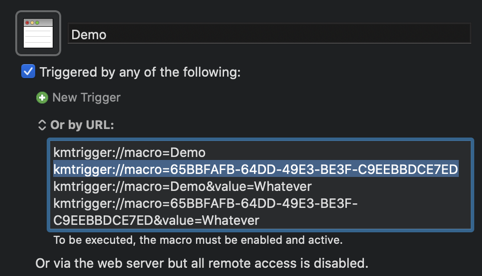
Next, add a web site action to a button in the Stream Deck app and set the URL attribute to the macro URL. Leave the Access in background setting as disabled.
Conclusion
There are many ways you can utilise a Stream Deck to interact with Keyboard Maestro. The official plug-in and the KMLink plugin together provide an easy way to make use of both simplicity and complexity. But if you are unhappy utilising the KMLink shortcut, with slightly more effort, you can reproduce the same functionality by using the native Stream Deck website action.
Ease of access and power should both be at your fingertips when utilising tools like Keyboard Maestro and the Elgato Stream Deck, and with the details provided above, hopefully this will enable you to get that ease and power in the set-up as well as the resulting use.