Workflow: Chaining Workflows
08 Jul 2015Workflow is a fantastic iOS automation app that allows you to do many wonderful, amazing and even crazy things. One of the problems for me through has been controlling process flow can be quite cumbersome - particularly with the larger and more complex workflows as well as workflows that I’d like to loop in some way or re-use. The programmer in me has certainly been pining for this sort of feature.
Of course workflow being workflow there is a way to work around this limitation - at least to an extent which has improved workflow creation vastly for me.
The Aspiration
In programming languages you often which to repeat action and or separate them out into a level of abstraction that makes it clearer. A common example in programming classes is that of making a cup of tea. A seemingly simple action, but it is a very high level of abstraction. It consists of many smaller sets of actions such as boiling water (which could be a set of actions re-used for making a cup of coffee) or adding sugar - an action you might repeat several times in making a single cup of tea if you have a sweet tooth.
When we split out all the sets of actions we have a list of procedural instructions that tell us what to do in what order … and that’s the bit I’ve created a workaround for in Workflow.
The Caveats
Before I continue I want to preface this strongly with the notion of this being a bit of a workaround rather than a beautifully engineered and integrated solution that will give programmer’s every sub-routine and recursive function functionality they could ever desire. What it can do though is unlock aspects of workflow re-use and I think to an extent the simplification of complex workflows in terms of flow control and looping.
I think this is straight forward enough to be used by many workflow creators and whilst it may not be for everyone I’d encourage you to give it a try.
The Premise
The approach I’ve adopted is based around a simple single level control workflow. It takes an input and then based on that sequentially determines what should happen next. It triggers that by calling another workflow using an x-callback URL.
The x-callback URL is a standard method by which one iOS application can call another with instructions about what to do on success/failure. In this particular case however we’re always returning to Workflow and we control all aspects so we are not making full use of the x-callback spec. functionality.
I’ve created a set of example workflows that illustrate how this works and shows how the data is passed between the workflows.
The Master Workflow
The master example workflow in this case is called “CallTests”. It begins by capturing the input (if there is any) into a variable called Param. Next a text action containing a set of JSON (a standard way of laying out data for storage and manipulation) is used to specify how this chain of workflows will work.
The first item in the JSON is called “RETURN”. This specifies the static content of the URL we’ll be passing to each workflow in the chain.
The following actions with numeric IDs (0-4) specify the workflows that are going to be run. The data part matching each entry specifies the workflow to be run. So here we’ll be calling workflow Test1, followed by Test2, followed by Test3 and finally we’ll repeat Test2.
The final JSON entry if “EXIT”. This simply specified how many actions there are. Note that we are dealing with a zero based action system. i.e. in this particular case when we come to run an item with ID “4”, it won’t exist and so the Workflow should complete.
The JSON text is converted into a JSON dictionary and stored in variable Control.
The next step is for the workflow to assess the input. The content of the Param variable is wrapped in asterisks and compared to “**” to see if it is empty. If it is, then Param is initialised to “0”. If not then we’re going to assume it contains an integer value.
The value held in Param is used as a key to read the JSON dictionary in Control to get the name of the workflow to run. The name is URL encoded and stored in flow. Note that if it is not found, there will be no workflow name in this variable.
The EXIT value in the JSON dictionary is now compared to the number in Param. If they are the same, Workflow will display an alert indicating that all workflows have been run and then exit. If they are not the same, the Workflow will set about running a workflow.
The first step in doing this is to populate a variable called Next Parameter with a value one more than is in Param.
Next the URL specified by RETURN in the JSON dictionary in the Control variable is URL encoded and the value in Next Param appended to it. This is then passed as an input parameter to the workflow specified by our earlier lookup of Param using the x-callback URL.
To summarise, at the end of the workflow, our master workflow calls another workflow using an x-callback URL. The workflow being called is based on the parameter being passed in (which should be an integer; or nothing if this is the initial call) and it is also passed some input - the name of the control workflow and the number that corresponds to the next workflow to call all bundled into a pre-configured URL.
A screen shot of the workflow can be found towards the end of this post.
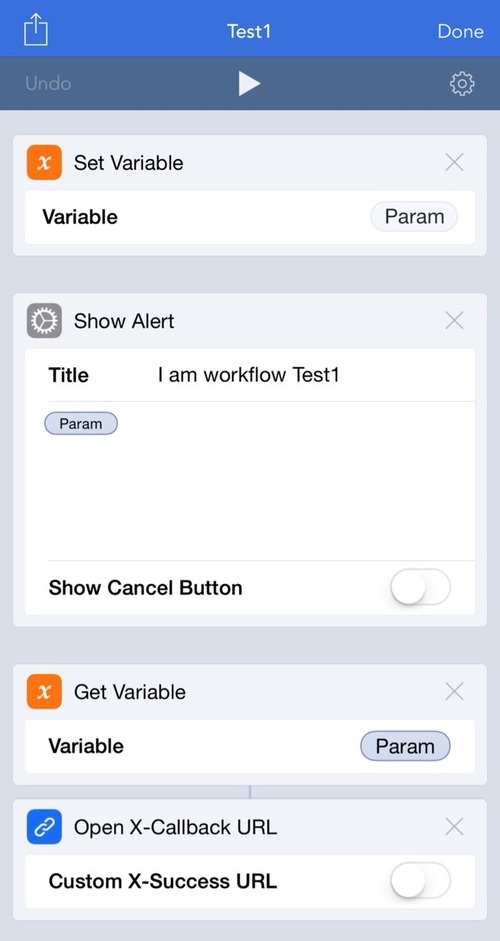
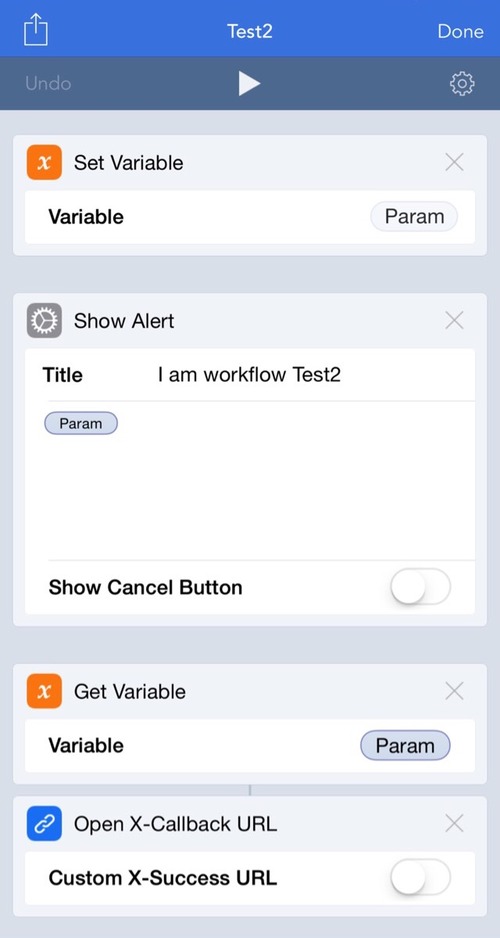
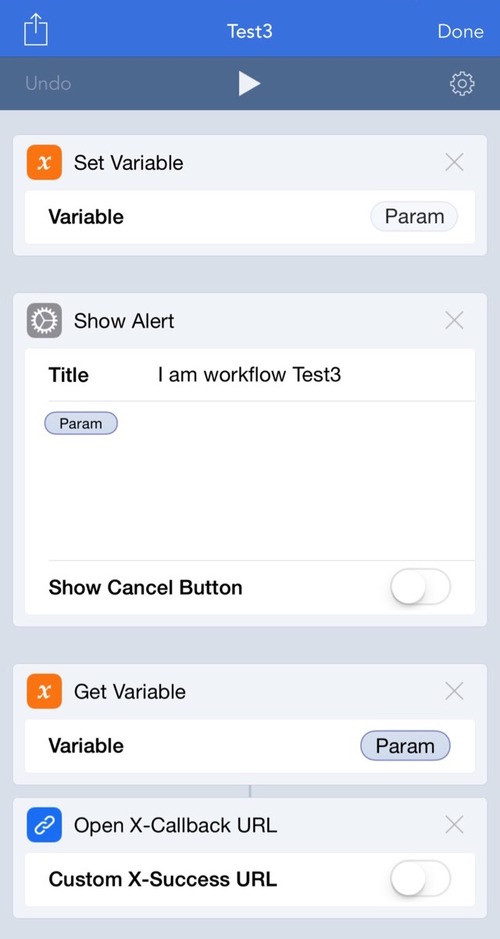
The Slave Workflow
In this test case, my test workflows are pretty much clones of one another … but of course this needn’t be the case at all. The basic structure however should be pretty much the same. Save the input, do your processing and finally return to the master workflow with instructions to carry run the next workflow.
Each slave workflow begins by capturing the input - again into a variable called Param.
The next action in the example workflows is to display an alert to the user. It is titled with the name of the workflow and the body of the message is the input the workflow received. This will be the URL that can be called to return workflow to the master workflow and be set to carry out the next workflow in the list (held in the JSON).
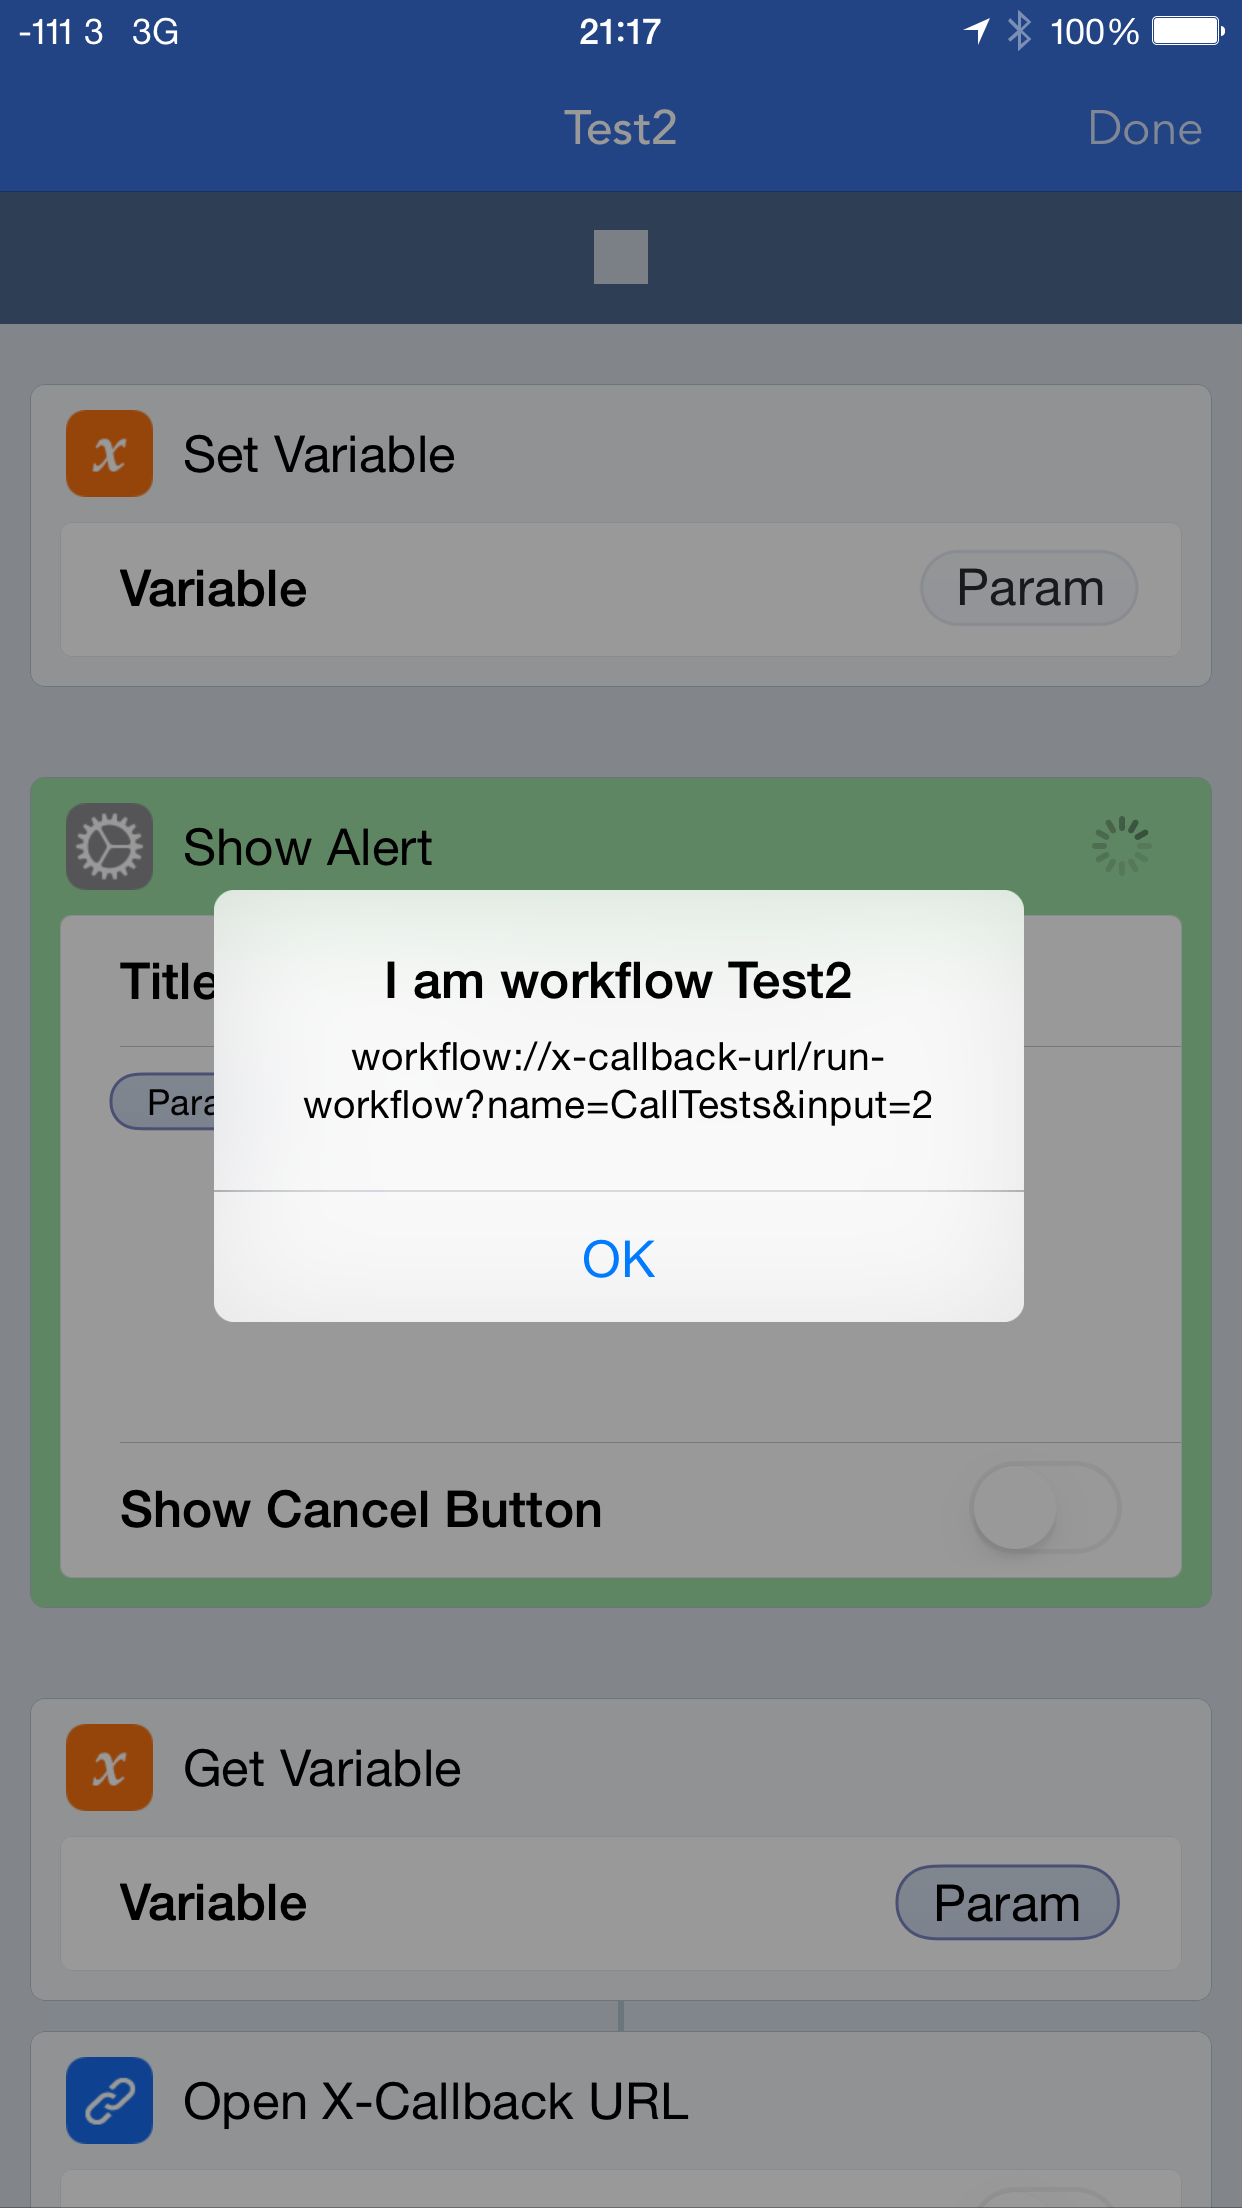
The final action as you probably guessed is to open the x-callback URL passed in as input at the start of the workflow.
The Result
That’s pretty much all there is to this set-up. The main work is in the master workflow. If you copy it and amend the JSON, you can quickly produce your own chained workflows. Just remember to store the input and to open it at the end in your slave workflows.
If you need to pass around other workflow information to be processed, you can either extend and parse/tokenise the input being passed through to the slave workflow or share data via the clipboard. I have tended towards the latter so far as often that’s a good way to initialise the whole process.
You can get yourself started with chaining workflows by downloading the workflows below:
- Download Workflow: CallTests.
- Download Workflow: Test1.
- Download Workflow: Test2.
- Download Workflow: Test3.
You can also view screen shots for each of the workflows below.
If you want to see a practical example of how this process could be used, check out the next blog post where I run through how I blog about Workflow workflows.
Screen Shots
Master Workflow

Slave Workflows